AG-1629
Programmable industrial IoT Gateway working on Linux systems. It provides the ability to install custom scripts and use ready-made scripts. Under the control of the NodeRED it gives unlimited possibilities for easy creation of gateway operation logic. It also has an cellular modem with support for 2 SIM cards. It has two LAN, to isolated RS485 interfaces and four opto-isolated I/Os.
Please read carefully before starting. Also read the product safety information.
General information
| Download technical specification | Technical Specification |
The AG-1629 is a quad-core, highly effective ARM-based compact-size multipurpose industrial computer with IoT gateway functionality. It is designed for edge computing. It supports of Linux Debian. The computer has a built-in independent whatchdog and a USB interface for debugging.
Model Selection
Atreyo manufactures several versions of the AG-1629 with respect to components and modules used in it.
| AG-1629 |
Memory | Hardware Options | More information |
||||||
| eMMC |
RAM |
Cellular Network | GNSS |
WiFi | BT |
||||
| GB |
GB |
GPRS | 3G | 4G LTE | |||||
| AG-1629 | 8 | 512 | Without cellular | ||||||
| AG-1629-LT-EU | 8 | 512 | √ | √ | √ | For India and EU | |||
| AG-1629-LT-EU-WL3 | 8 | 512 | √ | √ | √ | √ | For India and EU | ||
| AG-1629-LT-GL | 8 | 512 | √ | √ | √ | √ | Global model | ||
| AG-1629-LT-GL-WL3 | 8 | 512 | √ | √ | √ | √ | √ | Global model | |
| AG-1629-LT-EU-BT1 | 8 | 512 | √ | √ | √ | √ | For India and EU | ||
| AG-1629-LT-GL-BT1 | 8 | 512 | √ | √ | √ | √ | √ | Global model | |
Hardware
The gateway housing is made of anodized aluminum. There are heat sink fins on top. The gate heats up during operation and this is normal.
Side dimensions

Top dimensions
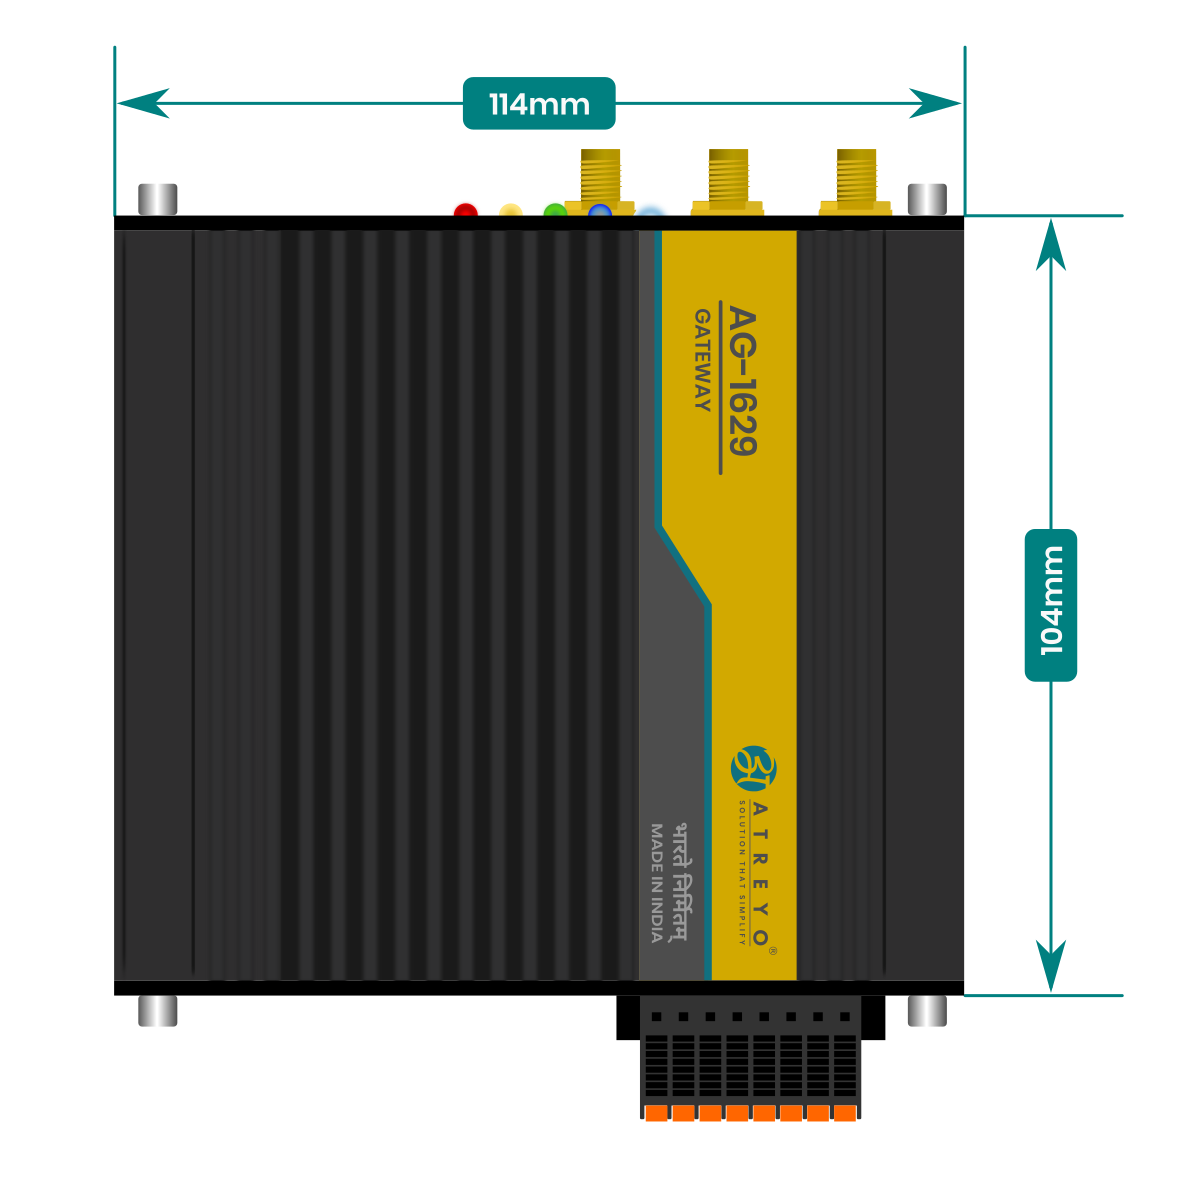
Panel view
Below is a view of the top and bottom panels with the interfaces described.


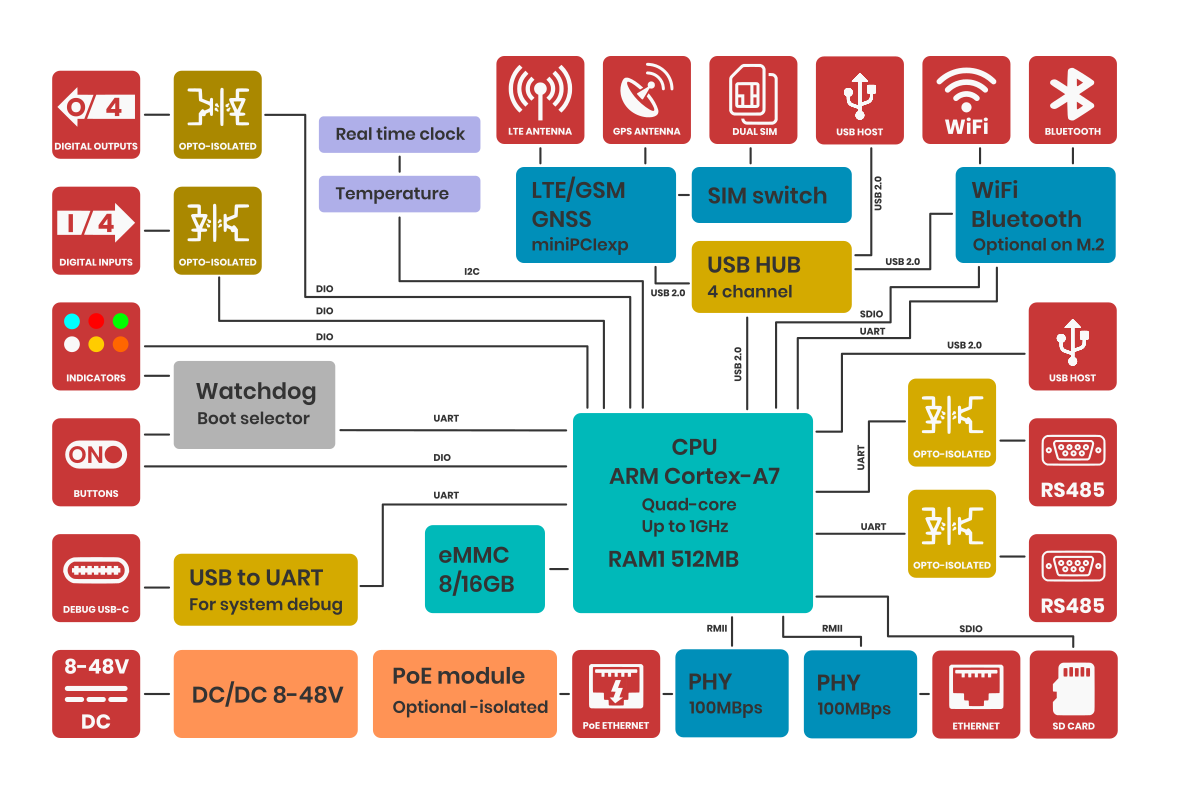
Block diagram
For a better understanding of how the computer works, we present a block diagram.
Configuration
RS485
For RS485-1 → "/dev/ttyS1"
For RS485-2 → "/dev/ttyS2"
Applications
As per specific need and requirement you can install any Debian supported open-source platform.
i.e. webmin for web-UI based device and system management, node-red for block programming and openPLC etc.
Node-RED
Node-RED is a digital flowchart tool for connecting different online services and devices. It helps you easily create automation and data-handling processes without needing to write a lot of code, you can use the web interface to design even very complex flows for automation control.
Prerequisites
You need to install the required packages.
- curl
- bash
You can find the instructions here.
- Install Node-RED using root user.
- If Node-RED is installed under normal user, replace normal user in Node-RED service with root user.
Installation of Node-RED
First, update the repositories.
sudo apt-get updateEnter below command to start node-red installation process:
bash <(curl -sL https://raw.githubusercontent.com/node-red/linux-installers/master/deb/update-nodejs-and-nodered)If any error encounters During the installation process, i.e. "user is not in sudoer group", either give sudo privileges' to normal user or you can try to run whole process as root, but that can be done only on specific requirements.
it will ask for various questions while installation startup, all of them are answered with a "Y", But enter "N" when it asks for 'Raspberry PI spec node'.
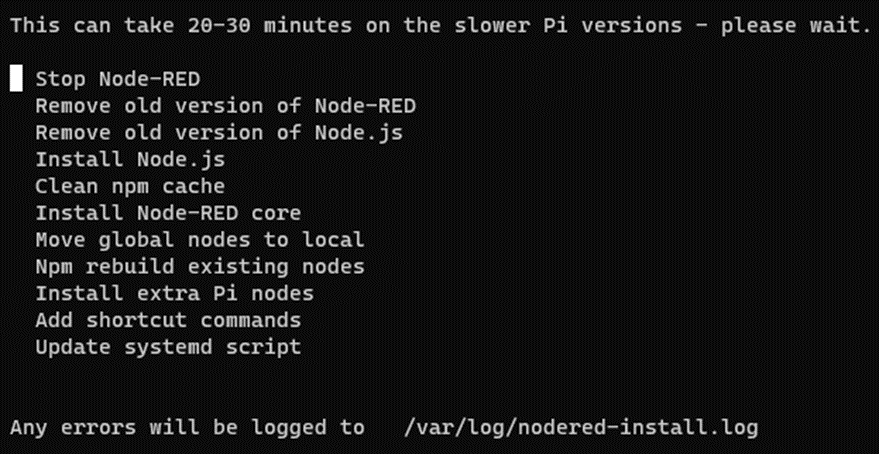
Wait for above process to be finished!
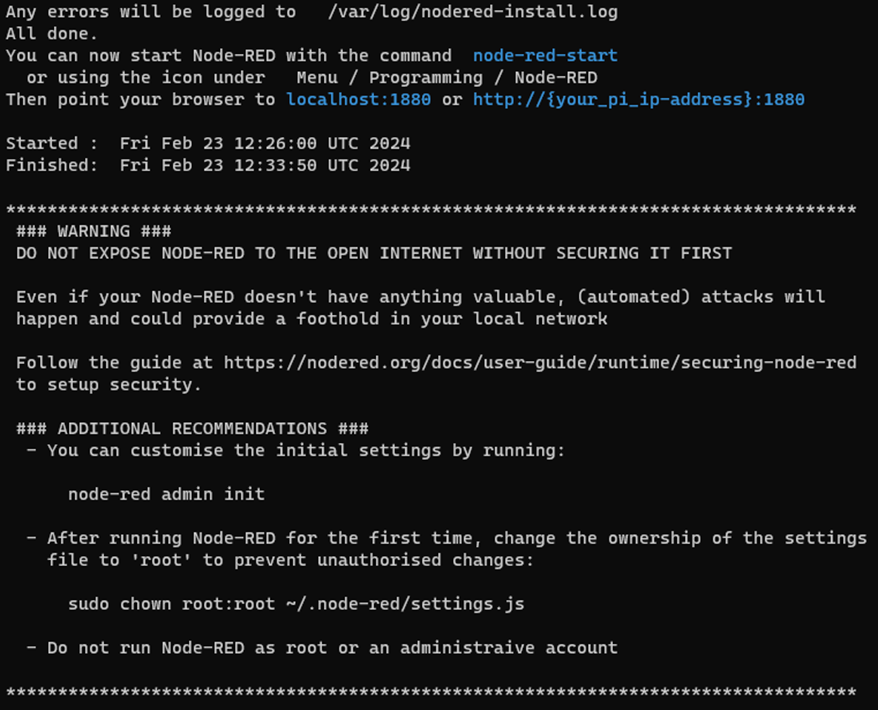
As shown below go through warnings and exec "sudo chown root:root ~/.node-red/settings.js" as suggested.
At the end, the installer will ask if we want to secure the instance. Hence it is necessary secure it, enter the username and password for the Node-RED panel as per convenience. (Ref image below)
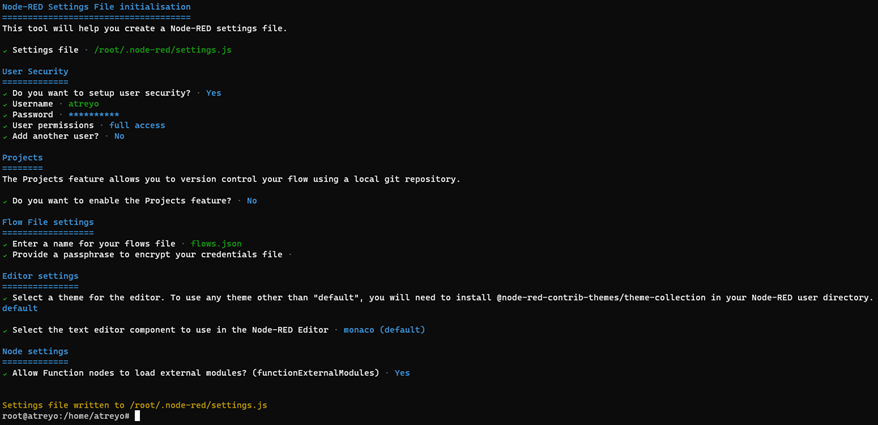
For sack of avoiding any hurdles go with basic/default settings, But must apply password.
Remember to make your password long and complicated enough. The security of your gateway depends on it.
After installation, you need to execute below command:
sudo node-red-pi --max-old-space-size=256Node-RED will start and will be available on port "localhost:1880".
Open in any browser of host system connected to same IP range or in same networking area.
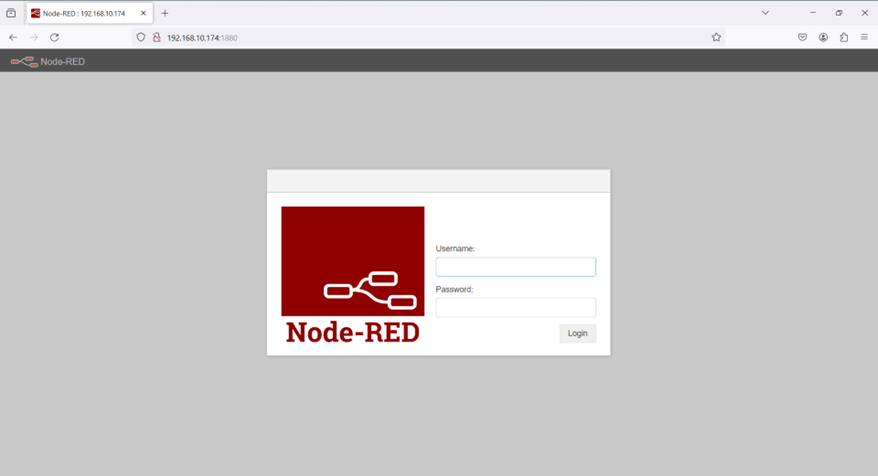
It will prompt for "username/password", feed with the same credentials configured back while installation process.
Node-RED AutoStart
In the last step node-red was started after manual command executed in CLI,
In order to automatically start node-red on gateway startup, it needs to be entered into the startup system. To do so, execute below commands:
sudo npm install pm2@latest -gIf ask to " run `npm fund` for details", do the same and process for next command:
sudo pm2 start /usr/bin/node-red --node-args="--max-old-space-size=256" -- -vYou will get below output after command executed, check for user in table, if not "root", need to change user to "root" from normal user.

If user is "root" proceed to below command or else skip this step.
pm2 save
pm2 startup
For changing user from "normal user" to "root" for node-red startup, follow below steps:
sudo pm2 start node-red -u root
sudo pm2 save
If any warning shown on screen use "--force" flag, i.e. "sudo pm2 save --force"
Must check the symlink created should have service "pm2-root.service"
sudo pm2 startup
sudo pm2 save
Reboot the device, for cross checking and verifying proper installation.
once rebooted, check below command:
ps -aux | grep pm2
Check either it's daemon running over root or not, if not you might have misguided somewhere and make mistake while installation, please refer again and install.
Open "localhost:1880" and start node-red.
Webmin
The Webmin administration panel, which allows you to administer the server via the web interface, can be installed on the Gateway. The Webmin panel has many functions related to web hosting and one of them is updating your Linux packages. To install Webmin you need to connect a keyboard, mouse and monitor via USB HUB and it is necessary to have access to the Internet.
Prerequisites
You need to install the required packages.
- curl
- bash
You can find the instructions here.
Webmin installation
Start the gateway and launch the terminal. Enter the commands below.
curl -o setup-repos.sh https://raw.githubusercontent.com/webmin/webmin/master/setup-repos.sh
sh setup-repos.sh
Above script will automatically setup repository and install needed keys on system, also it will provide webmin package for installation.
execute below command for installation, If confirmation is required during installation, enter 'y'. Then type the below commands:
apt-get install webmin --install-recommendsThe entire Webmin system should install without errors.
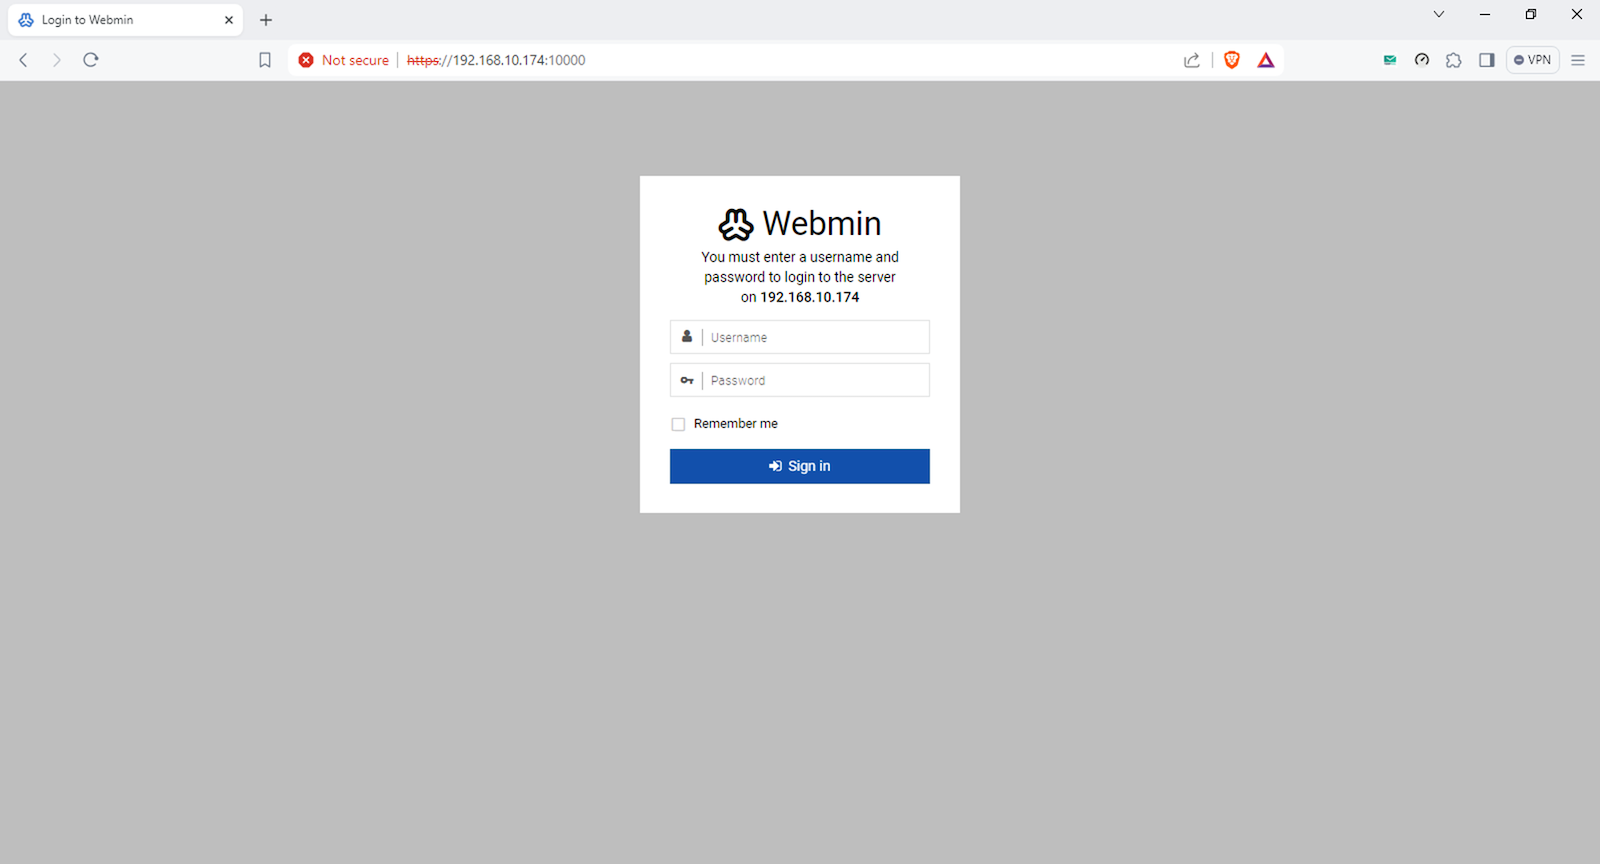
Once installation is successful you can access webmin on port 10000 over localhost IP, in any browser.
i.e. : http://localhost:10000 or http://192.168.10.174:10000
if any privacy error appears continue with Proceed to <localhost_IP> (unsafe)
The login panel will open and pop-up for credential will appear. you need to provide system's credentials here. i.e. user/pass : atreyo/12345
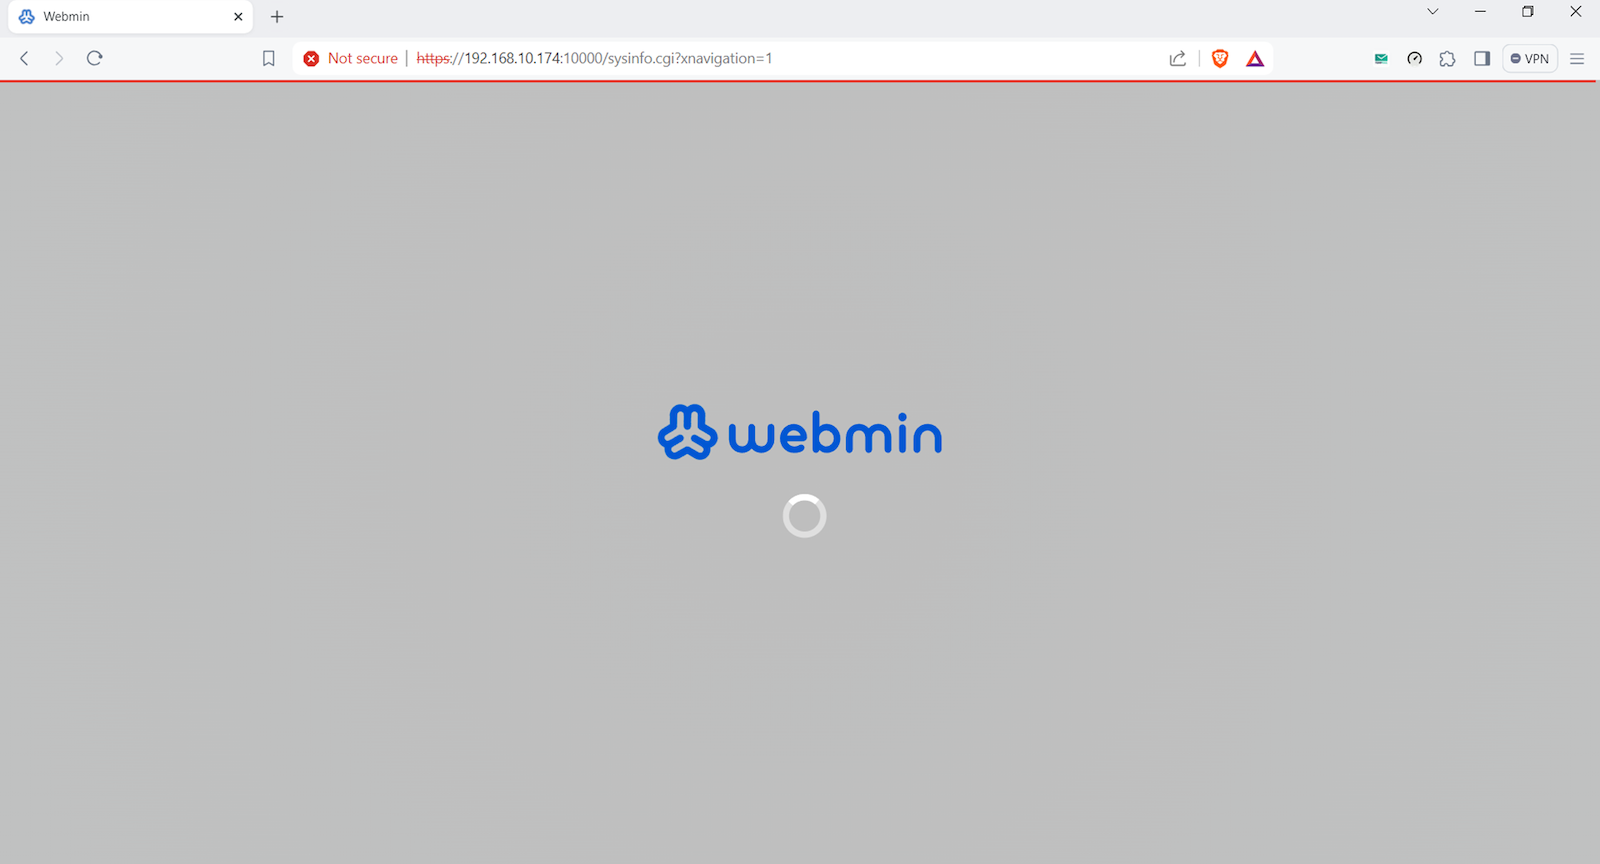
Once you sign in with password, below interface will open and it's a dashboard of webmin.
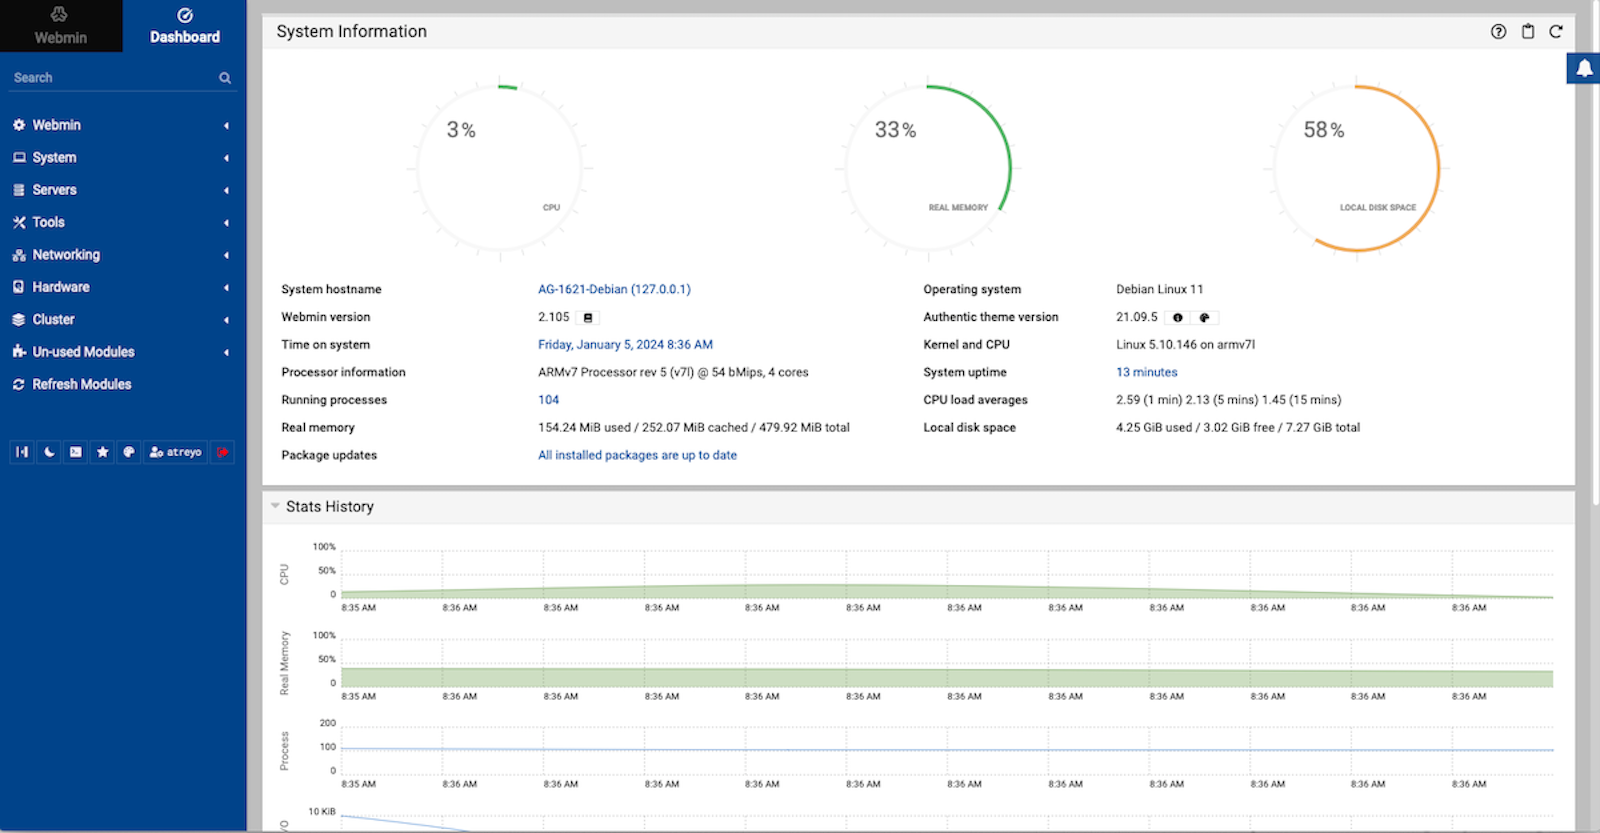
With Webmin we can update system packages, restart the gateway, change user and network settings and much more. For more about the Webmin panel visit Webmin Docs
OpenPLC
OpenPLC is an open-source Programmable Logic Controller that is based on an easy to use software. It is the first fully functional standardized open source PLC, both in software and in hardware. The OpenPLC project was created in accordance with the IEC 61131-3 standard, which defines the basic software architecture and programming languages for PLCs.
OpenPLC is mainly used on industrial and home automation, internet of things and SCADA research.
Installation of OpenPLC
To install OpenPLC on AG-1621 log in via SSH or if you are using the Webmin panel go to Tools > terminal and type the following commands. Remember that the whole installation and compilation of the program may take up to an hour of your time.
sudo apt-get install gitOnce installed, type the following command:
git clone https://github.com/thiagoralves/OpenPLC_v3.git
cd OpenPLC_v3
./install.sh rpi
The whole installation process will take some time. When it finishes it will display "Compilation finished successfully!" in the terminal. After rebooting the system, OpenPLC will start automatically.
To use in-development capabilities, checkout the development branch (git checkout development) prior to running install.sh.
Starting OpenPLC
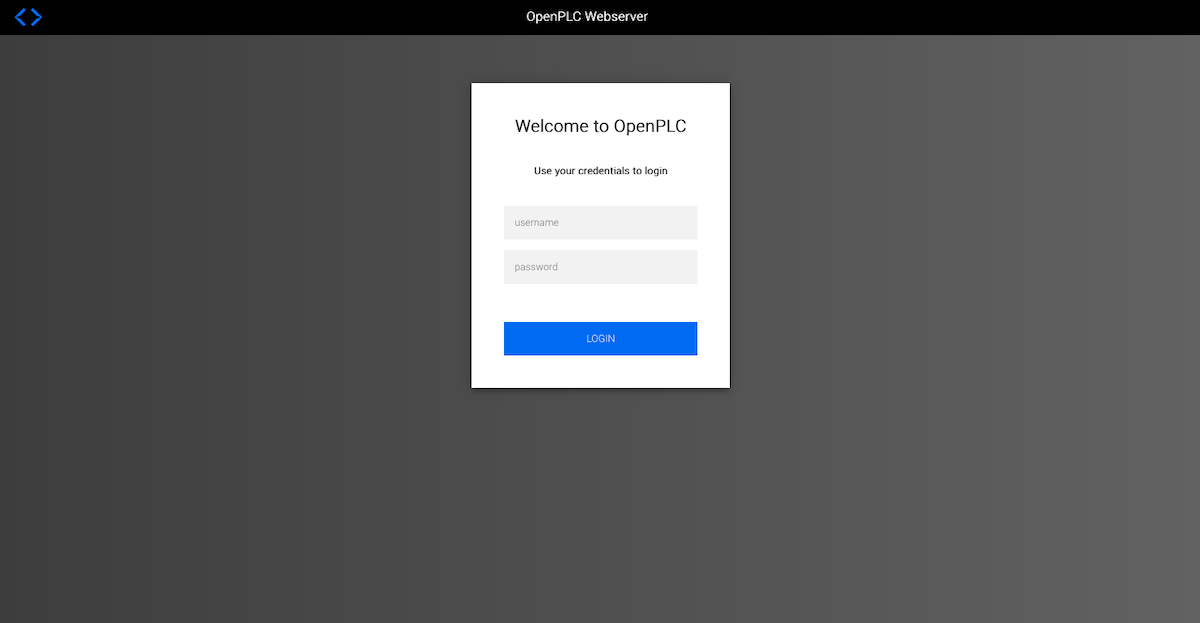
After restarting, enter the gateway IP and port 8080 in the browser address window. For example, 192.168.10.60:8080
The login window will open. The default username and password is:
login: openplc
password: openplc
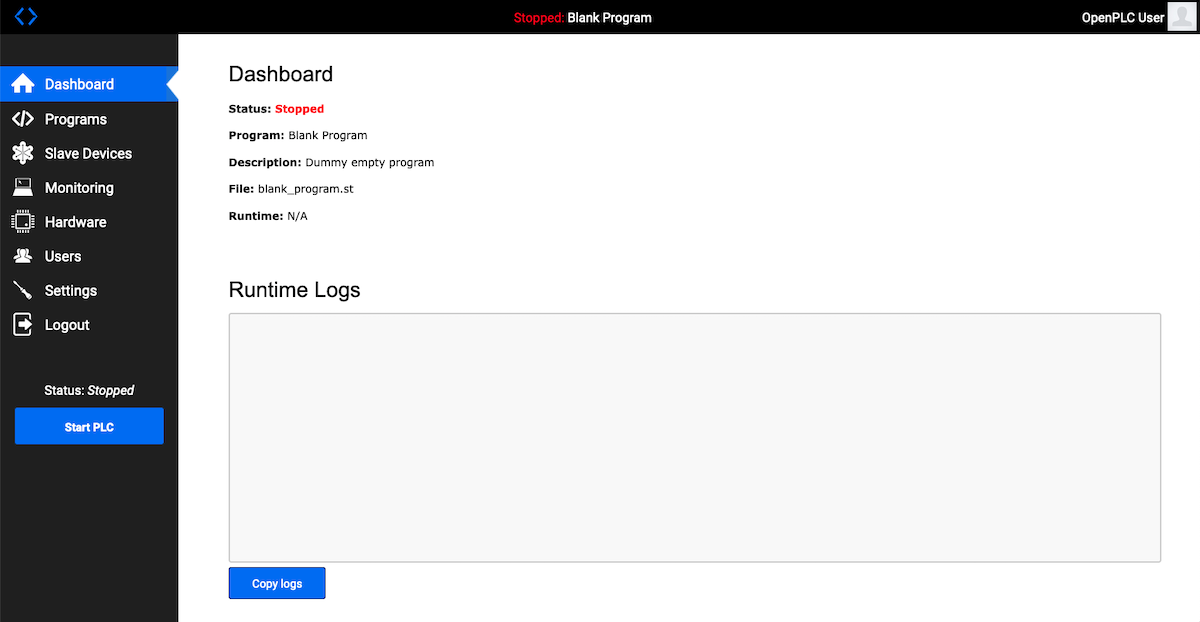
After logging in, we go to the home screen.
To learn how to use OpenPLC you can read on the site:
https://openplcproject.github.io/
Safety information
Operating environment
- The device is designed to be installed in clean, dust-free and insect-free places
- Operating temperature: -25 ~ 65°C (-13 ~ 149°F).
- Humidity range is 10% to 95% (non-condensing). Use the device in a dry environment.
- Away from heat sources and direct sunlight.
- It must not be exposed to acid fumes, salts and other chemicals.
- The device must not be used in places where there is a risk of gas explosion.
Use in inappropriate conditions may damage the device or shorten its life.
Electrical and power supply safety
- The device is powered with a voltage in the range of 8-48V. Voltage up to 24V is considered safe. Be especially careful when supplying them with higher voltages.
- The device has the ability to control the output with the Voltage of 50V. In this case, it is especially necessary to observe the safety rules during installation.
- Use only approved accessories
- Use the supplied power adapter or a good quality certified power adapter with the correct supply voltage range and sufficient power.
- Only use approved accessories like antenna etc.
Only a person with qualification and appropriate knowledge should install the device.
Malfunctioning and damaged device
- Do not disassemble the device.
- Only qualified personnel must service or repair the device or its accessories.
- If water or other liquid has got into the device, or if it looks mechanically damaged, do not connect the device, but take it to an authorized service center.
Radio frequency exposure
This device has been designed and manufactured not to exceed radio frequency energy emission limits set by regulatory agencies. To comply with RF exposure guidelines, the device must be used at least 20 cm away from a person's body. Failure to follow these instructions may result in exceeding the applicable RF exposure limits. This only applies to models with a built-in LTE modem.
What to do and what not to do
- You are solely responsible for the use of the device and any consequences of its use.
- Do not store or use the device in harsh environments such as dust, gases, oils, chemical vapors and damp places.
- Do not throw the device and its accessories. Handle with care.
- The device heats up during operation. Ensure proper ventilation.
- If you need to dispose of your device, check your local regulations for recycling and disposal of electronics.
- Route power, Ethernet, and antenna cables properly so that they cannot be accidentally pulled out.
- The device should be used and kept away from small children.