To maintain security, it is recommended to use long and complex passwords.
--- #### Cellular modem ##### Modem The Gateway in its basic configuration is equipped with an LTE modem that also supports GPRS and SMS functions. Different modems were used depending on the model variant. Here is a table of models. --- ##### SIM card The Gateway supports one microSIM card, both 1.8V and 3V. The card connector is tpush-pull type. When installing the SIM card, pay attention to the correct insertion of the card. [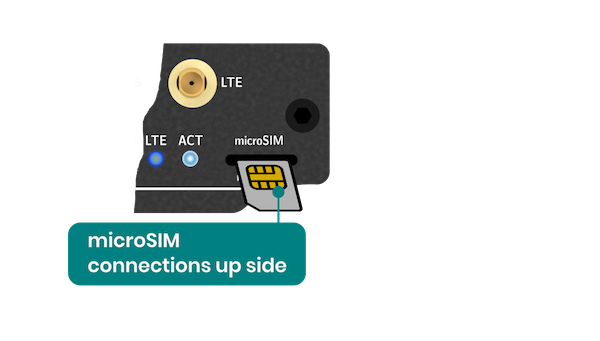](https://docs.atreyo.in/uploads/images/gallery/2025-02/ag-207-sim.png)The card can be inserted the other way around and you can have the impression that you have inserted it correctly. So take a close look at the above drawing.
--- ##### Using Cellular Network To activate the LTE modem, go to **Network > Interfaces** and select the lte tab there. [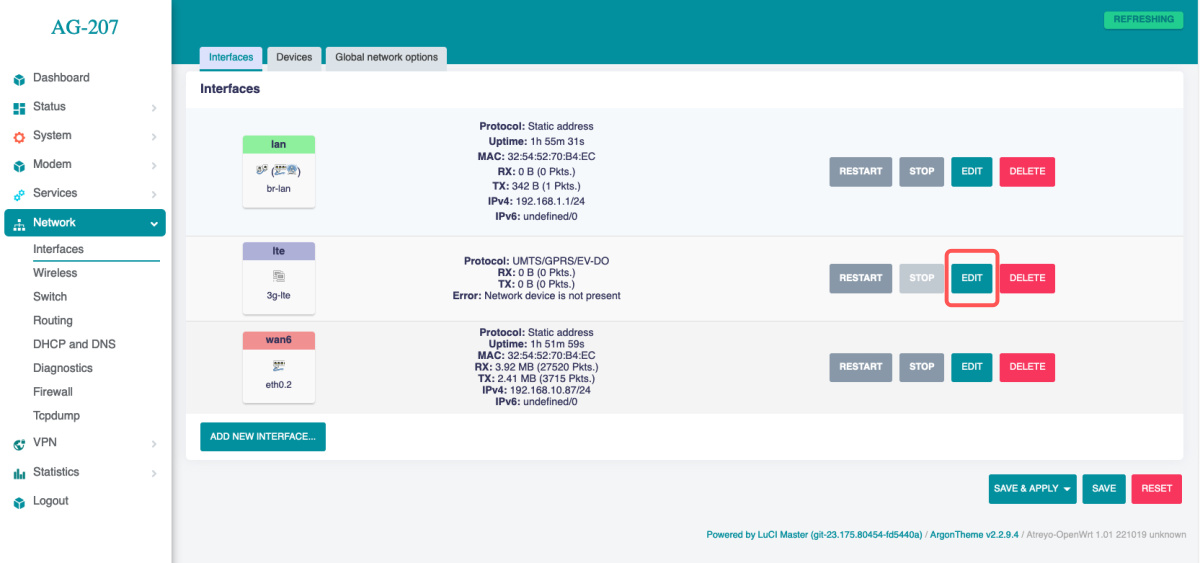](https://docs.atreyo.in/uploads/images/gallery/2025-02/ag-207-web-interfaces-modem.png) Mostly the network operator requires you to enter the APN, sometimes it also requires a username and password. Enter the required data and save. [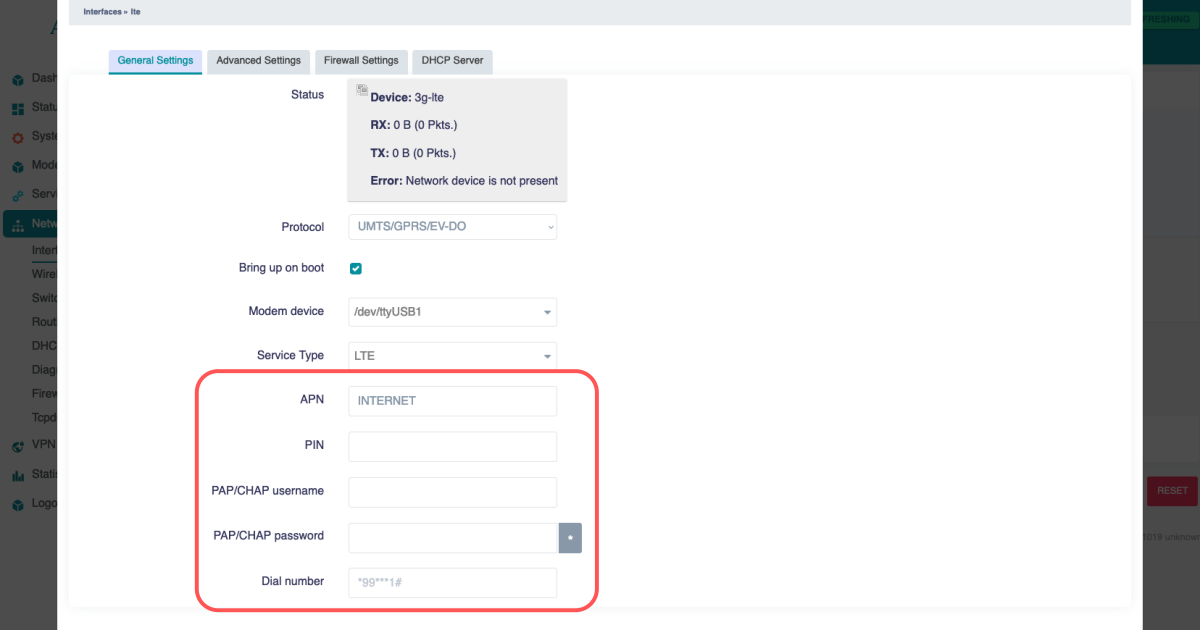](https://docs.atreyo.in/uploads/images/gallery/2025-02/ag-207-web-modem-apn.png) Then go to **System > Custom Commands** and click on **Start modem**. [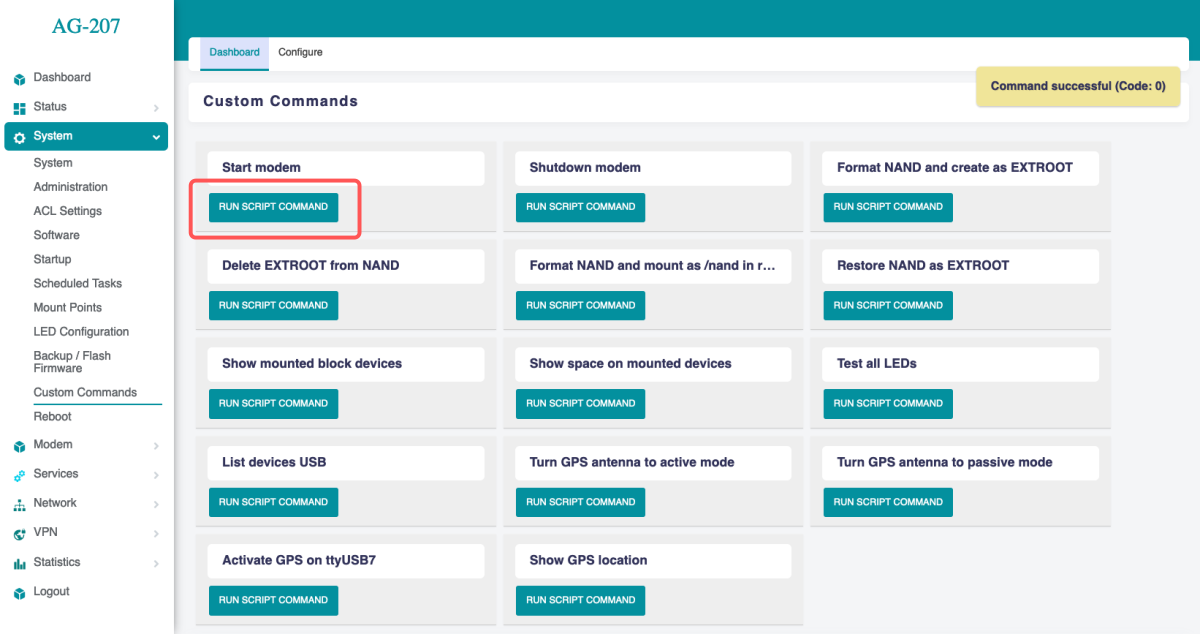](https://docs.atreyo.in/uploads/images/gallery/2025-02/ag-207-web-custom-commands-modem.png) The modem will start up and connect to the Internet. To check if it is working properly and what the signal is, go to **Modem > Information about 3G/4G/5G connection**. [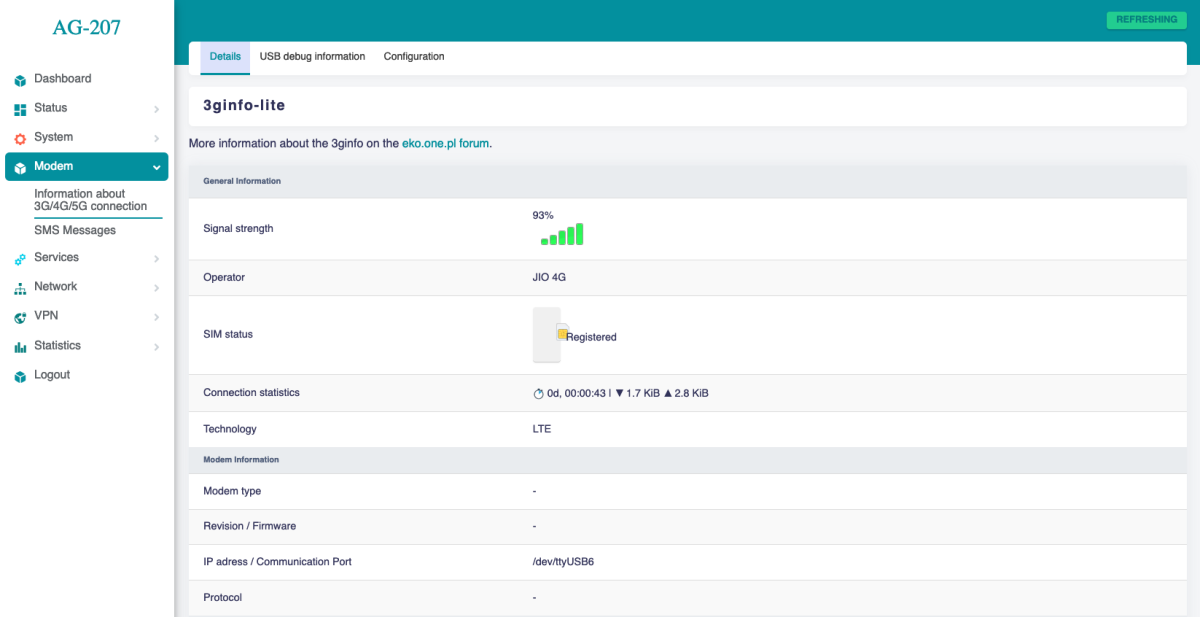](https://docs.atreyo.in/uploads/images/gallery/2025-02/ag-207-web-modem-info.png) ##### Cellular modem ON on start To make the gateway automatically connect to the Internet after startup, you need to add a modem startup in the **System > Startup section** under **Local Startup**, add a line before line **'exit 0'. /usr/commands/start\_modem.sh**. Then save the changes. After each reboot, the gateway will automatically start the modem. [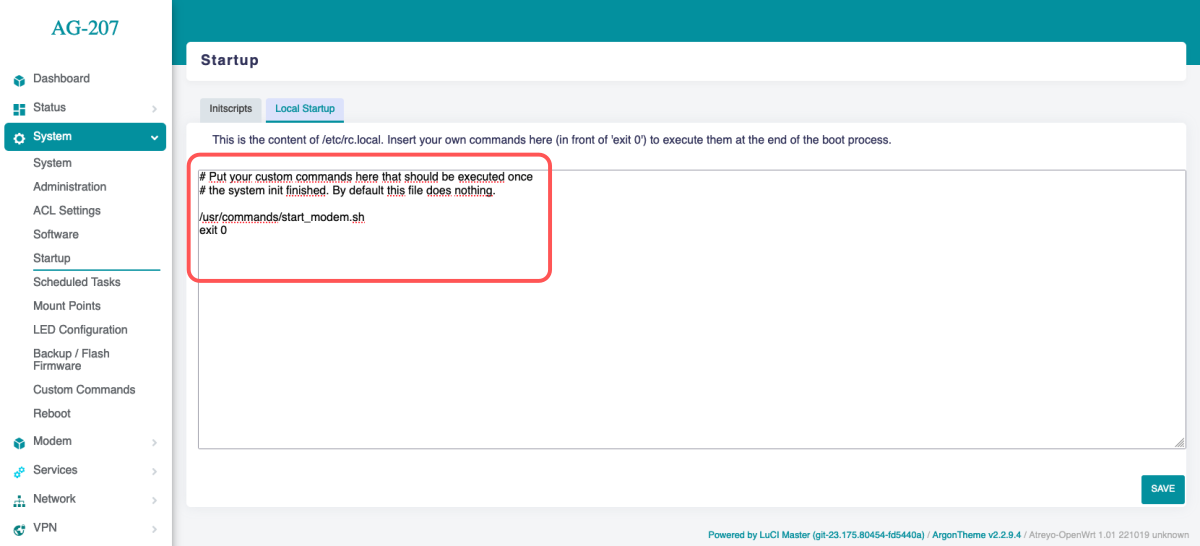](https://docs.atreyo.in/uploads/images/gallery/2025-02/ag-207-web-modem-sturtup.png) --- #### SMS To test the SMS operation, the gateway has an SMS interface installed. Under **Modem > SMS Messages**. There you can check sent and received SMS. Be sure to enter the phone number together with the country prefix, but without the + sign. The maximum number of characters is 160. The system does not support alphabets such as devanagari. The maximum number of messages in the inbox is 20. For send SMS go to **Send Message** tab. --- #### System statistics The gateway has a built-in real-time statistics system under Status > Realtime Graphs and accurate statistics with selectable time range under Statistcis > Graph. You can check CPU load, memory usage, network load, etc. ##### Realtime Load ##### Statistics Interfaces ##### Statistics Memory ##### Statistics Processor ##### Statistics System Load --- #### Modbus The Gateway has a very advanced Modbus application with a convenient graphical interface. Below are the capabilities of the application: - Modbus TCP/IP and Modbus RTU support. - Any number of serial ports - Support for external USB/serial interfaces - JSON, TCP/IP and MQTT string formation - Data logging in the event of no connection to a server - Storage of all data in internal memory --- #### Using the terminal The AG-702 has a built-in bash terminal. With it you can execute all commands in the OpenWRT system. To enter the terminal, go to the **tools > terminal** section on the built-in website. The default password is the same **root/root**. [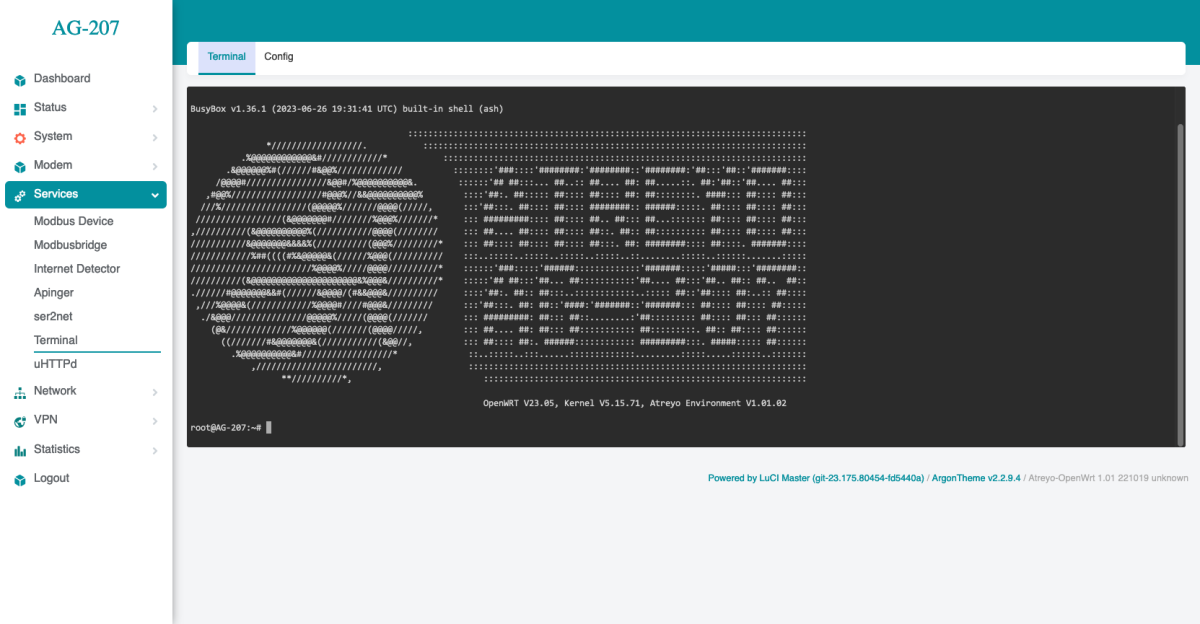](https://docs.atreyo.in/uploads/images/gallery/2025-02/ag-207-web-terminal.png) --- #### Reset and default ##### Make factory default To reset the system to factory settings, hold down the "Default/Reset" button for more than 5 seconds while the device is operational. During the factory reset, all LED indicators will light up for 2 seconds. ##### Reset device To restart the gateway without disconnecting the power supply, press and hold the "Reset/Default" button for less than 5 seconds. During the restart, 4 LED indicators will light up for 1 second (IN-1, IN-2, RS485, RS232)Do not hold the button for more than 5 seconds, as it will trigger the gateway to restore default settings.
--- #### Storage overlay ##### How to make a storage overlay AG-207 has a 512MB NAND memory in addition to the 64MB FLASH memory. It is possible in a very simple way to increase the memory by extending the system partition to the so-called overlay. To do this, go to the **System > Custom Commands** section and select **Format NAND and create as EXTROOT**. Then wait a while for the operation to complete when on boottom of page "Waiting for command to complete..." will close. The formatting process takes a few minutes. [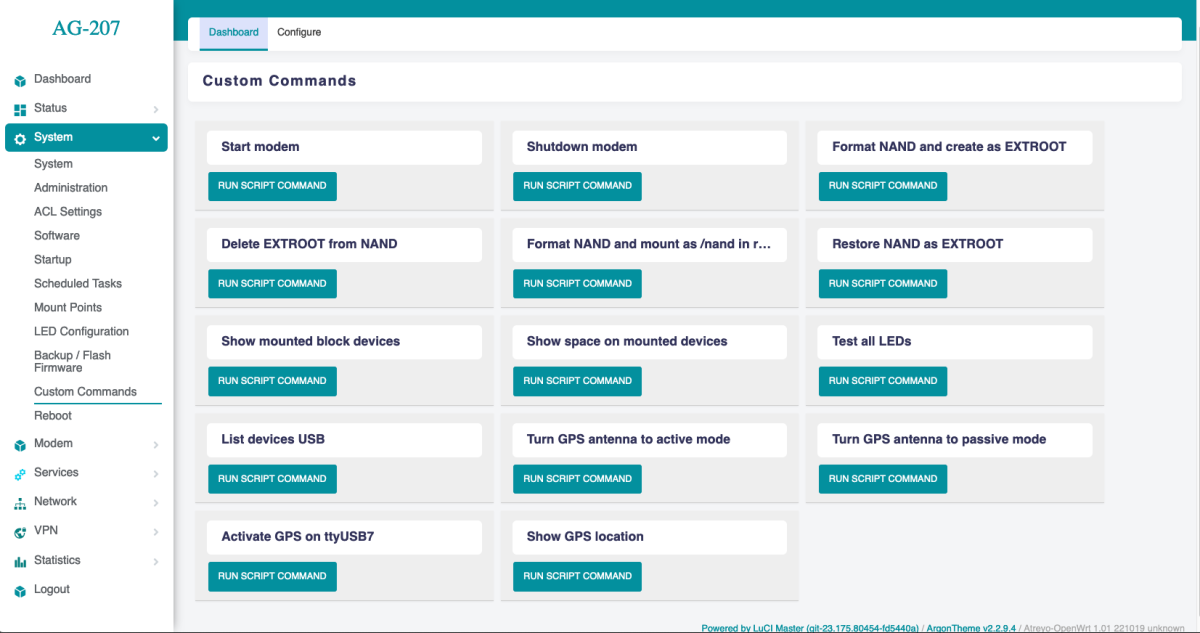](https://docs.atreyo.in/uploads/images/gallery/2025-02/ag-207-custom-commands.png) Then, to verify, go to **System > Mounting Points** and see if we have the overlay done correctly. [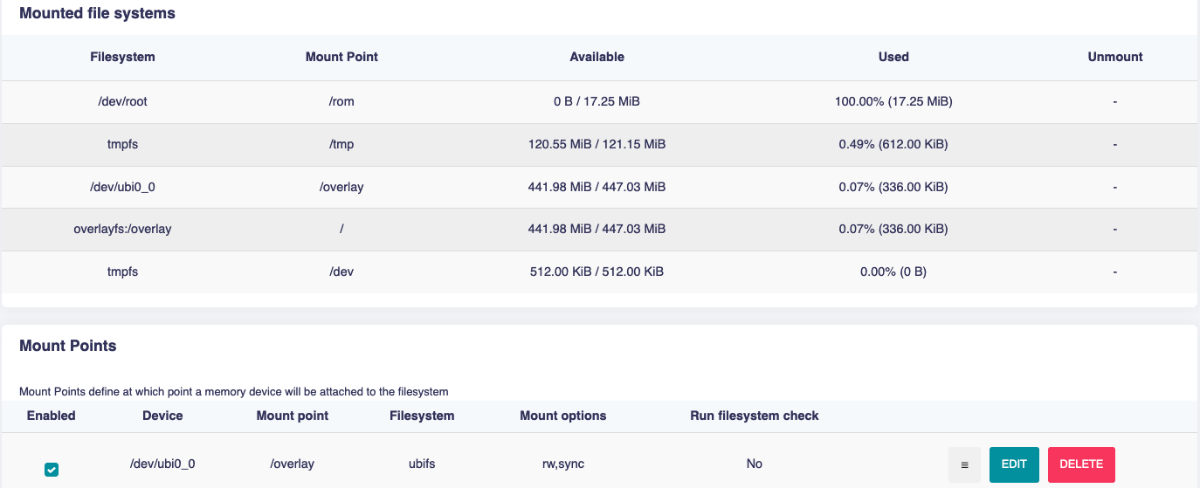](https://docs.atreyo.in/uploads/images/gallery/2025-02/ag-207-web-mounting.png) You can also restore partitions to their previous state and format the NAND as data memory. For this isn custom command section click on **Delete EXTROOT from NAND** and after that **Format NAND and mount as /nand in root file.** ---