Atra VPN Desktop Application
The Atra VPN Client is a secure desktop application that provides users with a fast and reliable way to connect to their organization’s VPN. Unlike apps that only act as a front-end, Atra VPN Client integrates directly with the OpenVPN.exe binaries and drivers, ensuring enterprise-grade security and stability.
With just a few clicks, users can:
- Launch the app and start a VPN tunnel securely.
- Quickly connect to pre-configured VPN servers or tunnels.
- Monitor session details such as IP address, connection duration, and status in real time.
Configuration and management of VPN tunnels (creating, editing, or deleting) are handled by administrators, while end-users can easily connect to available VPN sessions through the app without extra setup.
This approach gives the best of both worlds:
- Simplicity for users (one-click connect experience).
- Visibility into connected devices and session logs.
Key Features
- One-Click Connect: Simple interface for quick tunnel connection
- Real-Time Monitoring: View connection status, IP address, duration
- Auto-Update: Automatic notification and installation of updates
- Theme Support: Light and dark mode options
- Session Management: Remember credentials, auto-login
- Installation
- Signing In to the Atra VPN App
- Getting Started with the Atra VPN App
- Key Features of the Atra VPN App
- Troubleshooting Common Atra VPN App Issues
- Atra VPN Desktop App FAQs
Installation
System Requirements
Supported Operating Systems:
-
Windows 10 (64-bit) - Build 1809 or later
-
Windows 11 (64-bit)
Hardware Requirements:
-
Processor: Dual-core 2.0 GHz or faster
-
RAM: 4 GB minimum
-
Disk Space: 200 MB
-
Administrator privileges for installation
⚠️ Important: App is currently in BETA. Minor bugs may be encountered. Report issues to support.
Download Process
Step 1: Access Download
-
Log in to Atra RMS (web interface)
-
Navigate to VPN section
-
Locate Download button (top-left corner)
-
Click Download button
Step 2: Locate Installer
-
Installer downloads to your default Downloads folder
-
Filename: AtraVPNClientSetup.exe
-
Locate file in Downloads folder
Step 3: Run Installer
-
Double-click AtraVPNClientSetup.exe
-
Windows SmartScreen warning may appear.
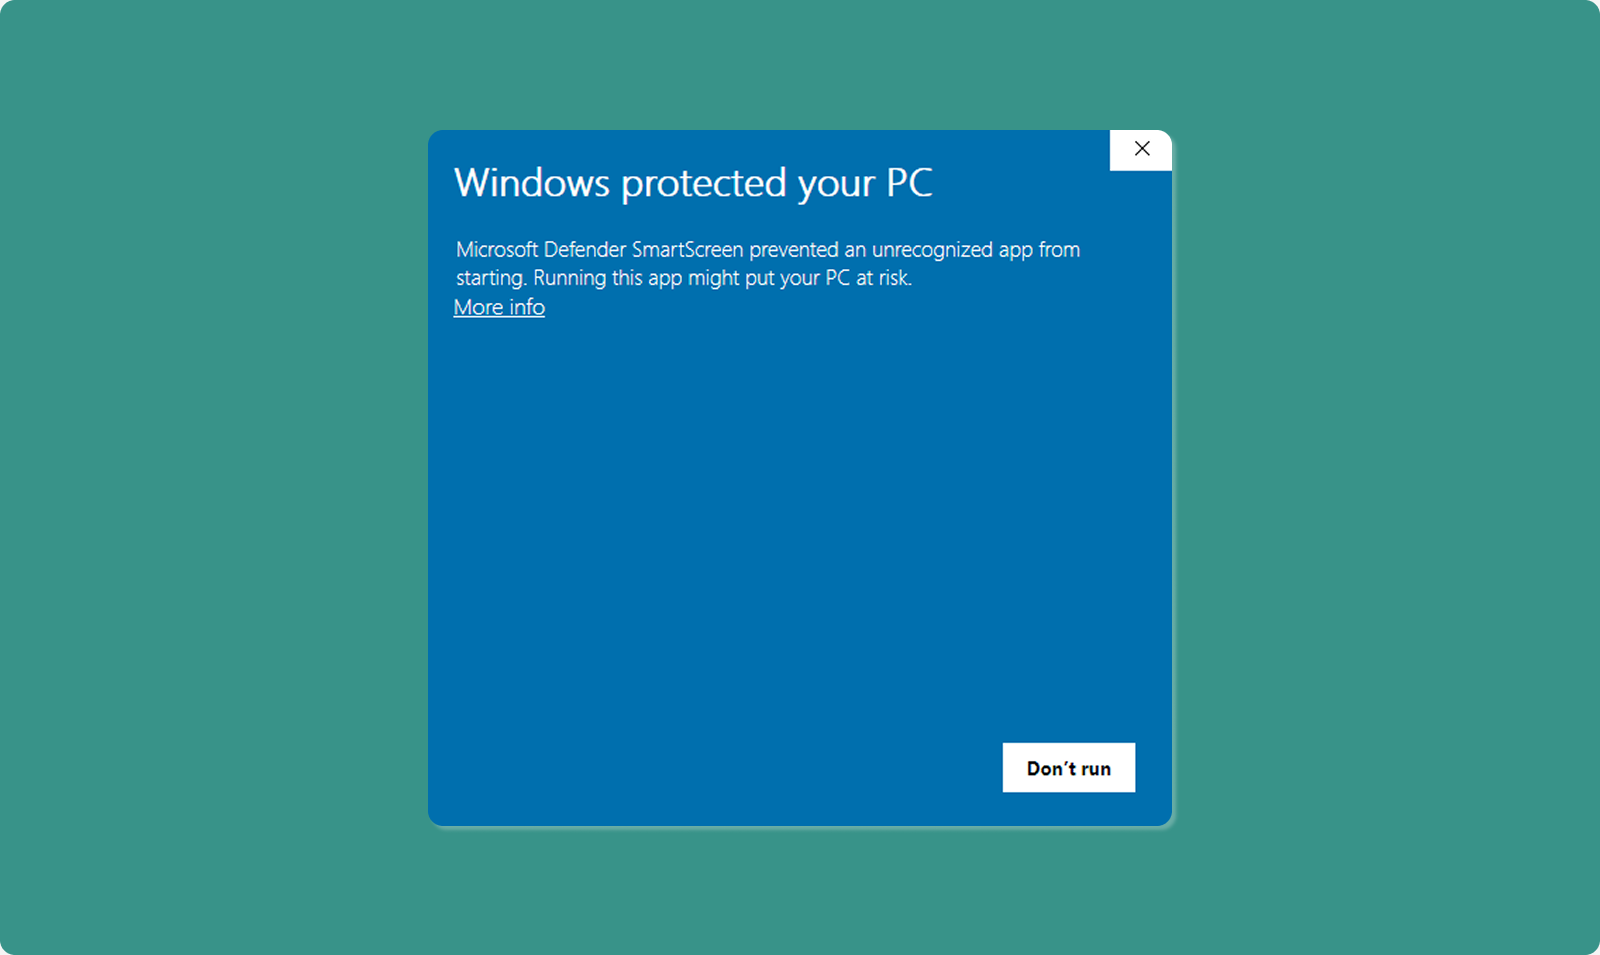
Windows SmartScreen Warning
Why This Appears:
-
Standard Windows security check
-
Appears for BETA apps not yet widely distributed
-
Does NOT indicate malicious software
-
Atra VPN Client is developed and signed by Atreyo,you can safely proceed.
How to Proceed Safely:
-
SmartScreen window appears: "Windows protected your PC"
-
Click "More info" link
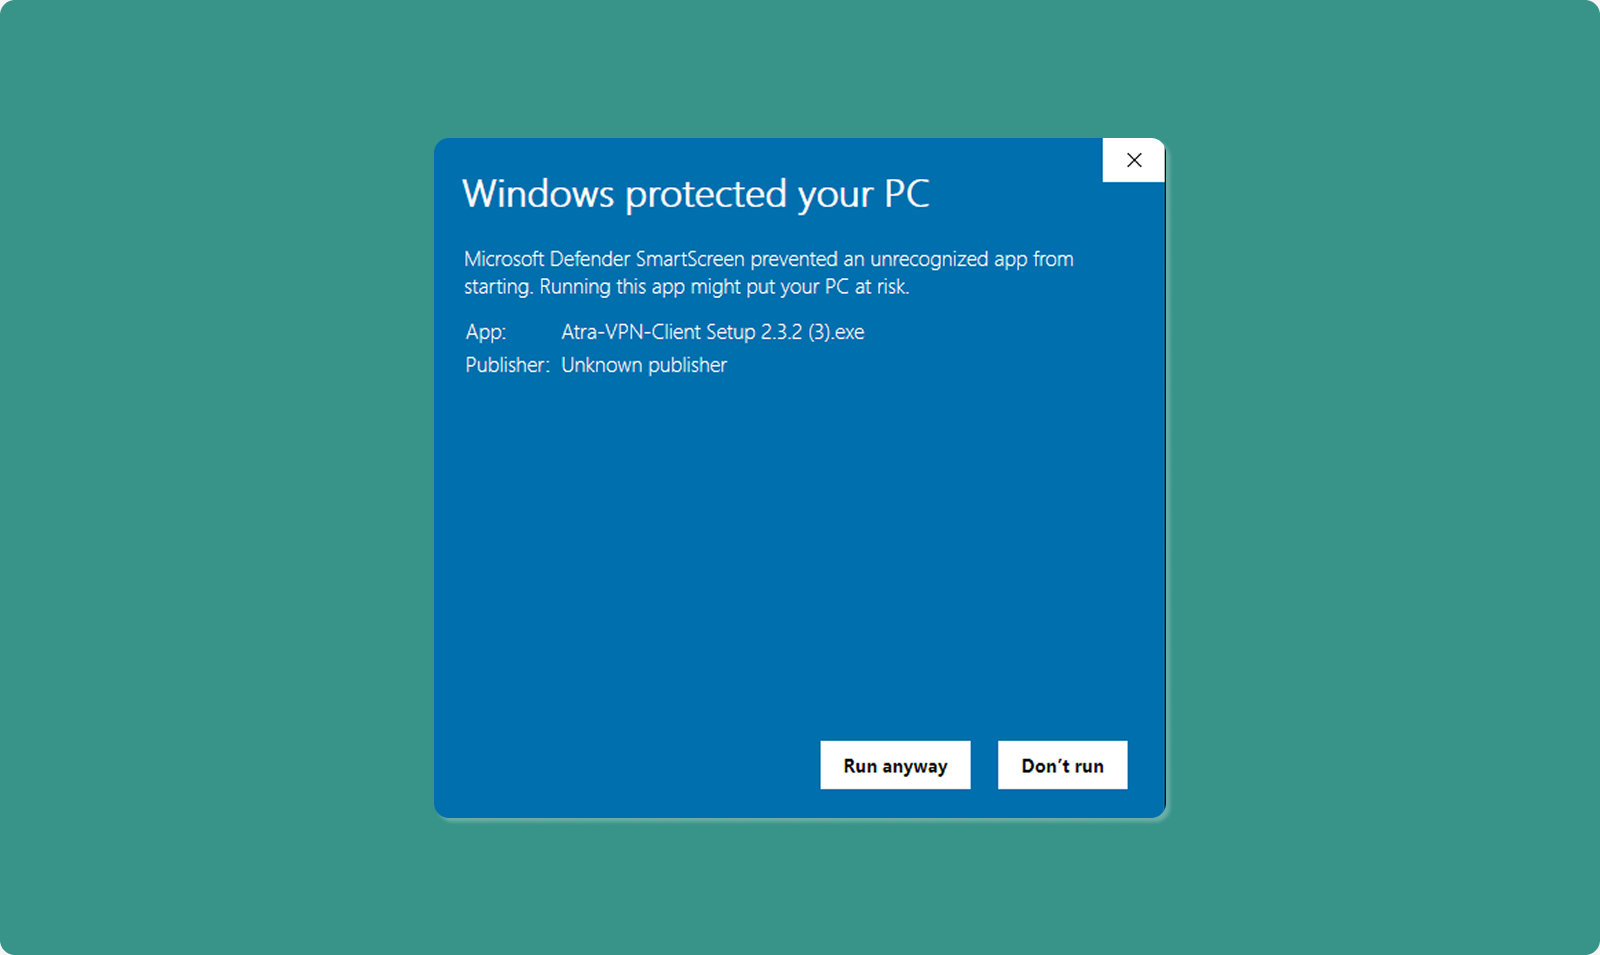
-
"Run anyway" button appears
-
Click "Run anyway"
-
Installation proceeds
Step 4: Administrator Permission
Windows User Account Control (UAC) prompt appears.
-
Message: "Do you want to allow this app to make changes?"
-
Click "Yes" to grant administrator privileges
-
Installation wizard opens
Why Administrator Rights Needed:
-
Install OpenVPN drivers
-
Create system network interfaces
-
Modify network routing tables
-
Write to Program Files directory
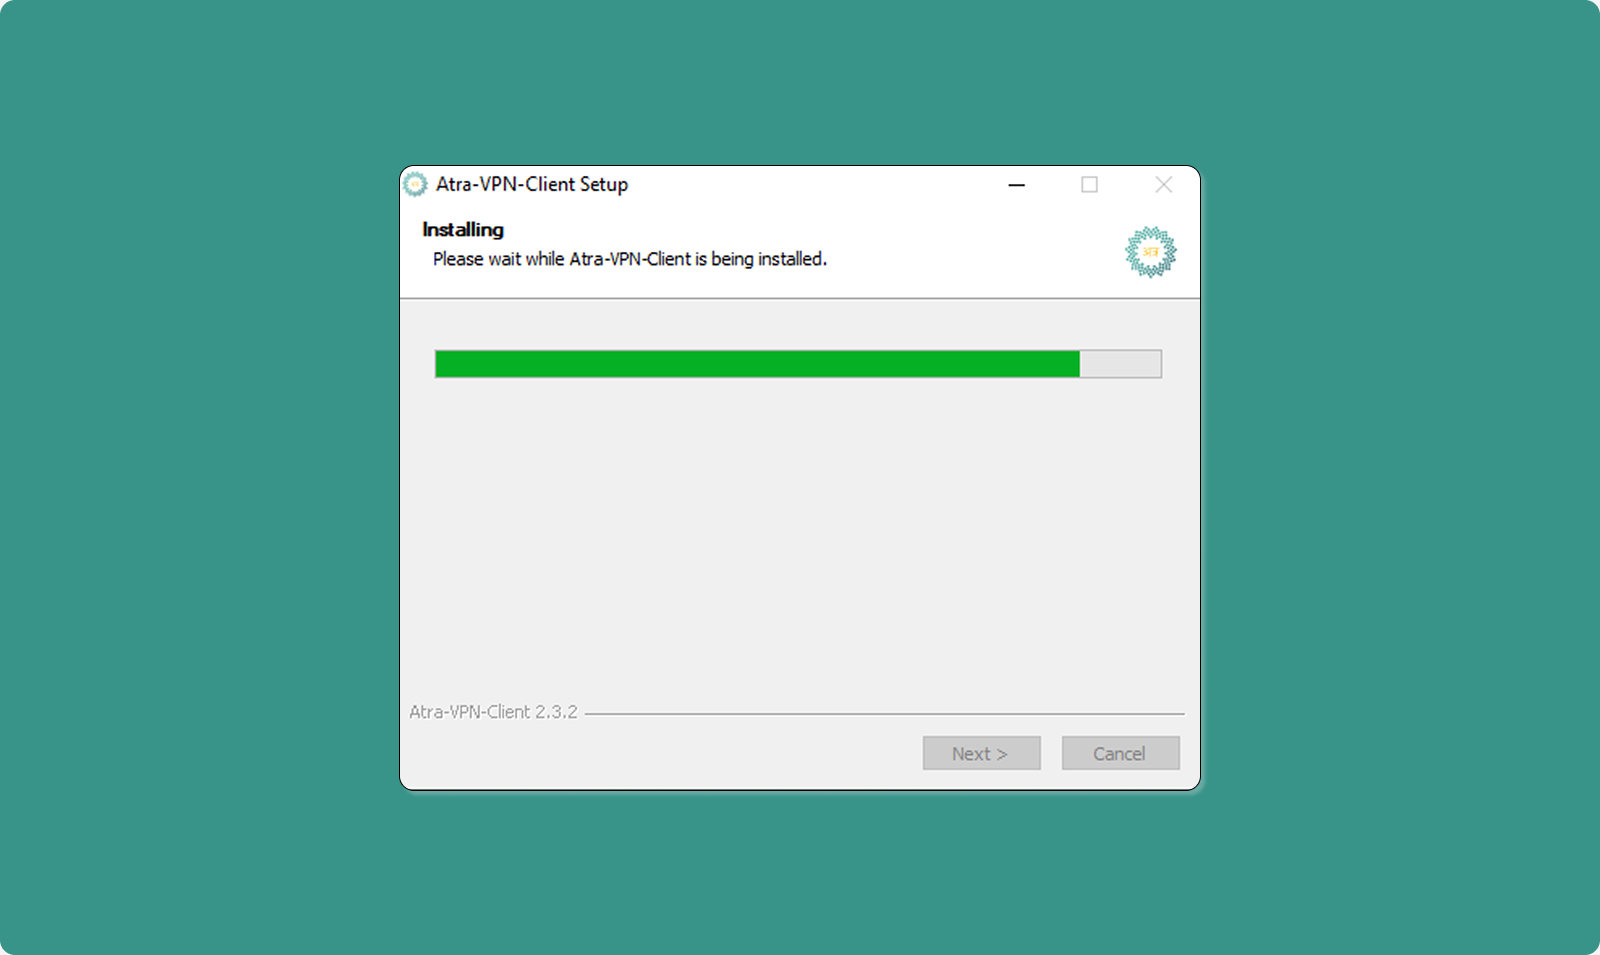
Step 5: Installation Wizard
Follow on-screen installation steps:
-
Welcome Screen: Click "Next"
-
License Agreement: Read and click "I Agree"
-
Installation Location: Use default or choose custom (click "Next")
-
Install: Click "Install" button
-
Progress Bar: Wait for installation (typically 1-2 minutes)
-
Completion: Click "Finish"
Step 6: Launch Application
After installation completes:
-
Atra VPN Client automatically launches
-
Login page displays
-
Ready for authentication
Desktop Shortcut: Installer creates desktop icon for future launches.
Signing In to the Atra VPN App

First-Time Login
Step 1: Enter Credentials
Use the same credentials as Atra RMS web platform.
Email Field:
-
Enter your registered email address
-
Example: user@company.com
Password Field:
-
Enter your Atra RMS password
Step 2: Click Login
Authentication Success
Upon successful login:
-
Main dashboard displays
-
VPN tunnels list loads
-
Associated organization shown
-
Profile avatar appears (top-right)
Getting Started with the Atra VPN App
Application Dashboard Overview
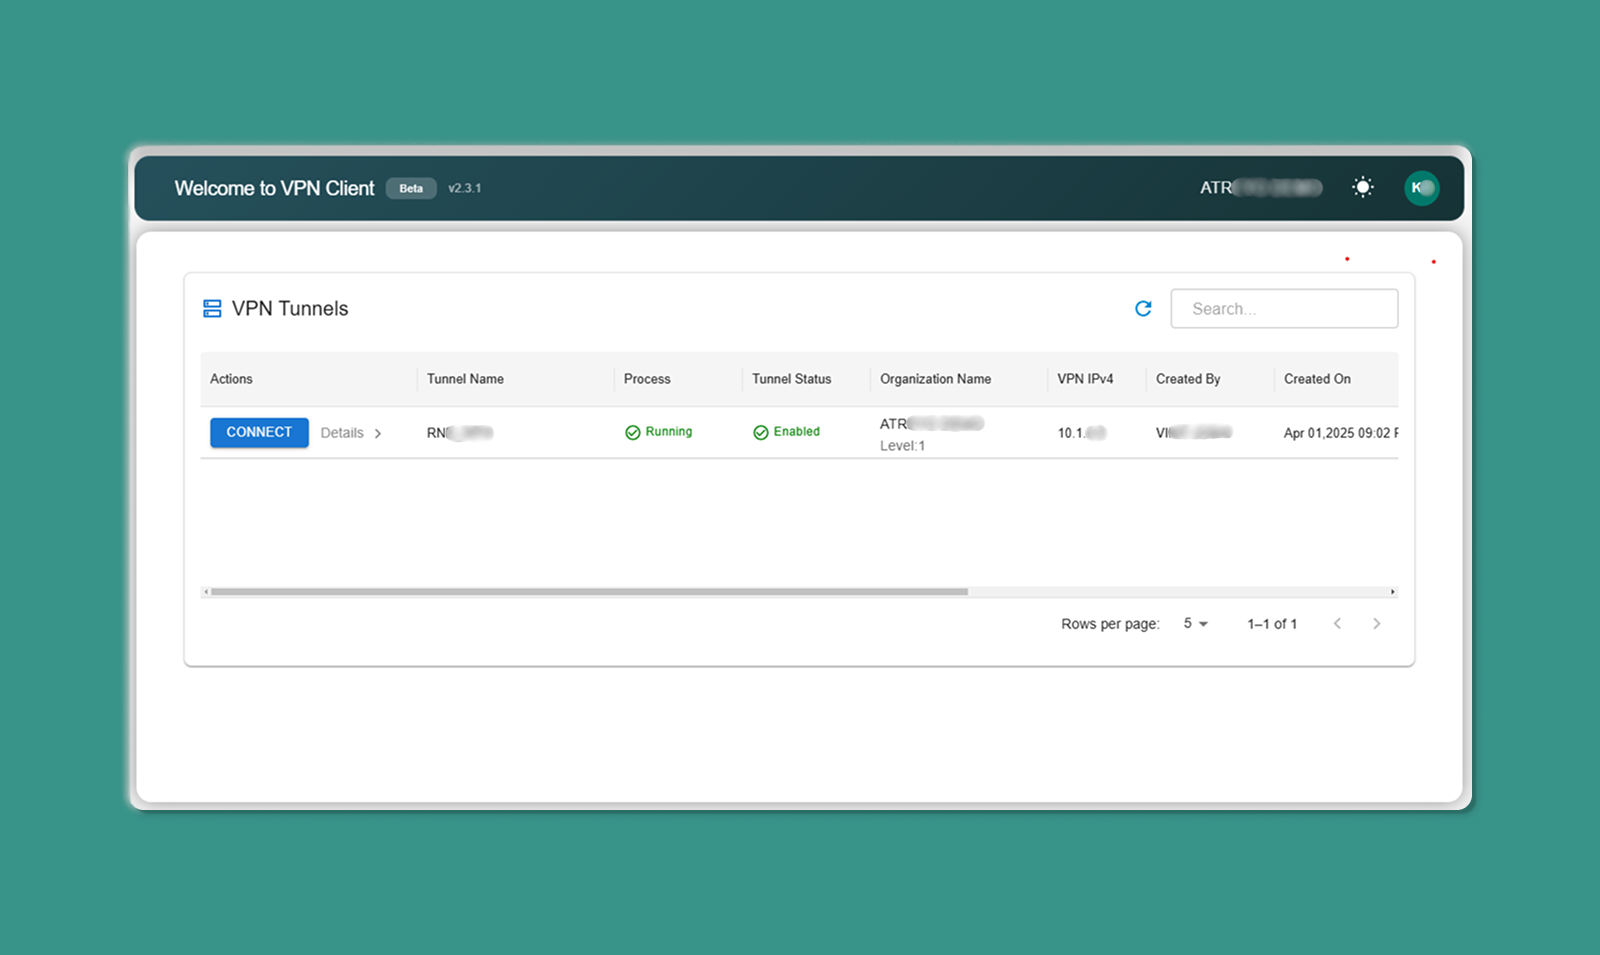
The main dashboard has three sections:
Top Bar:
-
App Version: Current version number (e.g., v1.2.3)
-
Organization Name: Your associated organization
-
Theme Toggle: Switch between light/dark mode
-
Profile Avatar: Access account menu
Middle Section:
- Search Bar: Filter tunnels by name/organization
- Refresh Icon: Manually update tunnel list
- Table Navigation: Rows per page, page controls
Main Area:
-
VPN Tunnels Table: List of available tunnels
Top Bar Elements

1. App Version
Display: Top-left corner
Format: "Atra VPN Client v1.2.3"
Purpose: Shows current installed version
When to Check:
-
Troubleshooting issues
-
Verifying you have latest version
-
Reporting bugs to support
2. Associated Organization
Display: Below app version
Format: "Organization: [Your Org Name]"
Purpose: Confirms which organization's tunnels you see
What This Means:
-
You see tunnels created in your organization
-
You see tunnels your organization has access to
-
Cannot see tunnels from unrelated organizations
3. Theme Toggle
Location: Top-right area
Options: Light Mode | Dark Mode
How to Use:
-
Click theme toggle switch
-
Interface immediately switches themes
-
Preference saved automatically
-
Applied on next launch
Benefits:
-
Light Mode: Better for bright environments
-
Dark Mode: Reduces eye strain in low-light conditions
4. Profile Avatar

Location: Top-right corner
Icon: Circle with user initials or icon
-
Email Address (display only)
-
Organization Name (display only)
-
Logout option (click to sign out)
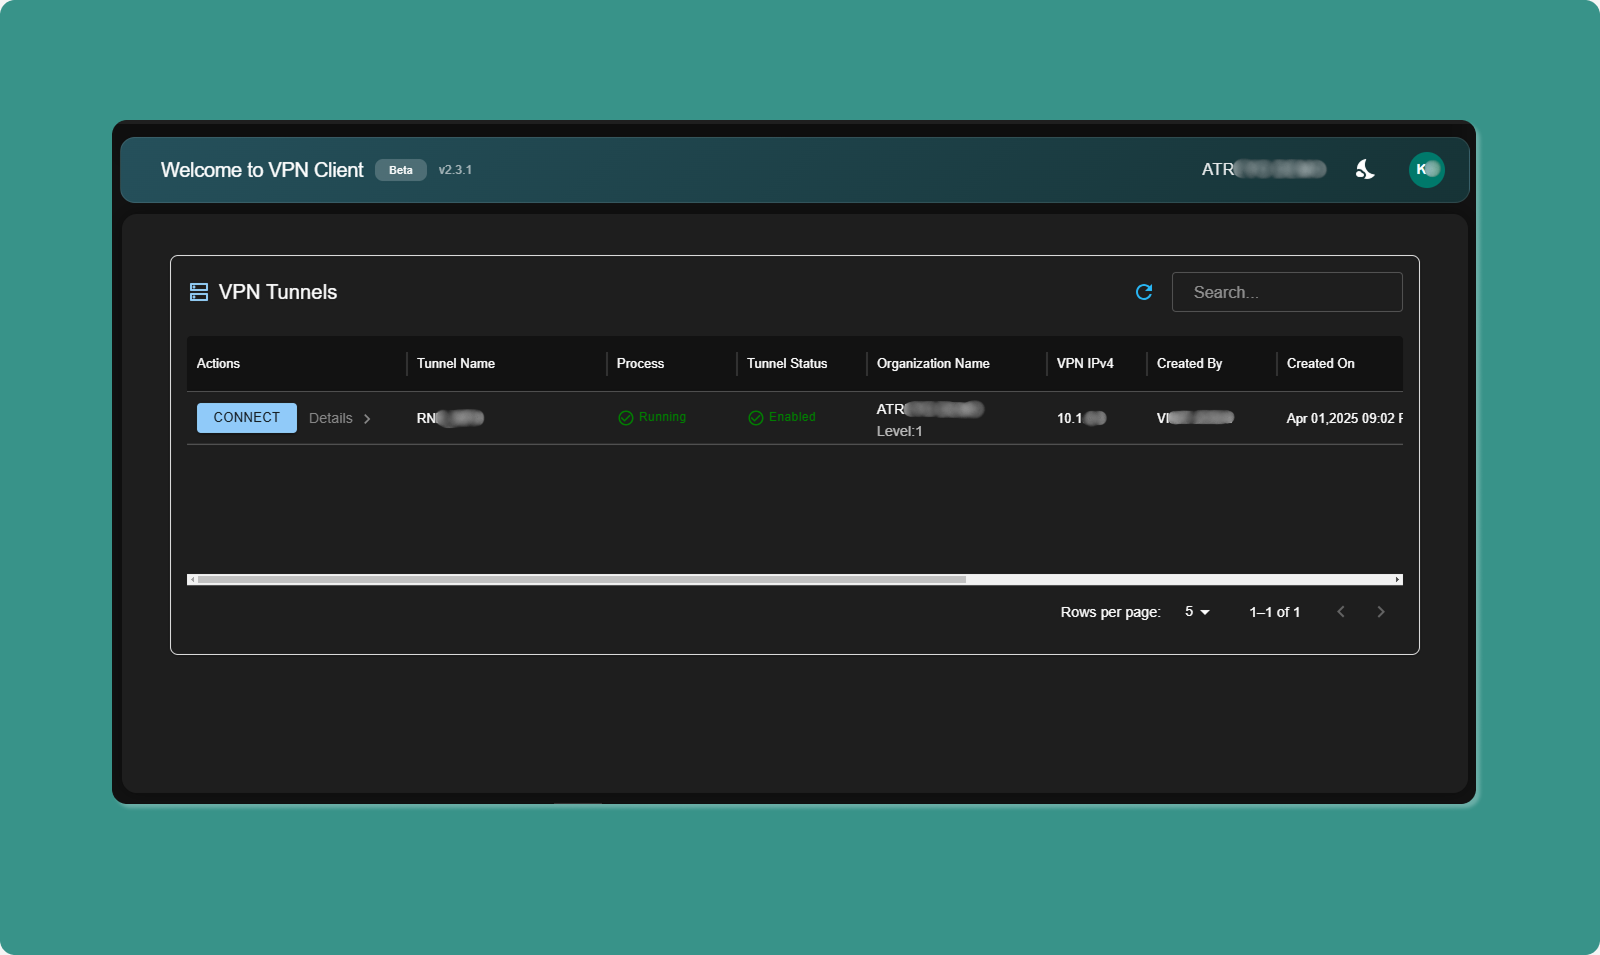
VPN Tunnels Table
The main table displays all VPN tunnels you have access to.
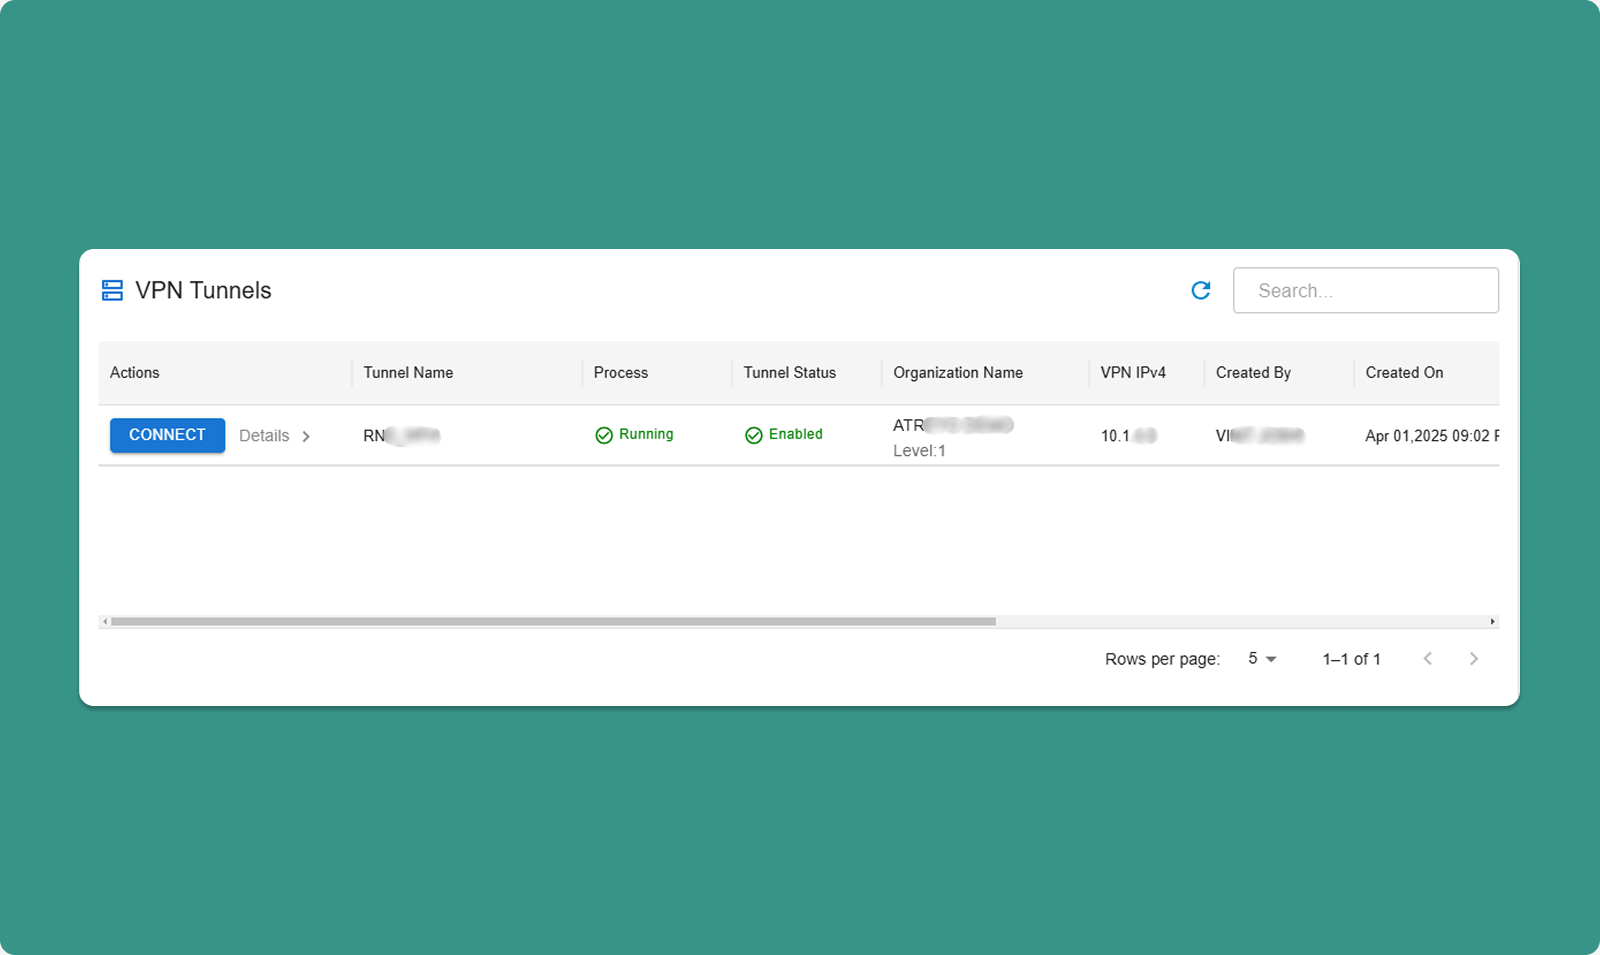
Table Search & Refresh
Search Bar:
-
Type keywords to filter tunnels
-
Searches: Tunnel name, organization, created by
-
Real-time filtering (results update as you type)
Refresh Icon:
-
Click to manually update tunnel list
-
Useful after tunnels are created/deleted in web interface
-
Rows per page: 10, 25, 50, 100
-
Total Count: "Showing 1-10 of 25 tunnels"
-
Page Navigation: Previous, Next, page numbers
Table Columns
|
Column |
Description |
Values |
|
Connect Button |
Connect/disconnect from tunnel |
"Connect" or "Disconnect" |
|
Details |
Opens sidebar with device info |
Button with icon |
|
Process Status |
VPN server process state |
Running, Exited |
|
Tunnel Status |
Management state |
Enabled, Disabled |
|
Organization Name |
Tunnel's organization |
ATREYO DEMO |
|
Organization Level |
Hierarchy level |
Level: 1, 2, 3 |
|
VPN IPv4 |
Tunnel gateway IP |
10.8.0.1 |
|
Created By |
Creator's email |
test@atreyo.in |
|
Created On |
Creation date |
2025-09-15 |
|
Total Users |
Users in tunnel |
10 |
|
Total Devices |
Devices in tunnel |
5 |
|
Max Clients |
Maximum capacity |
253 |
|
Allocated Clients |
Current users + devices |
15 |
|
Remaining Clients |
Available slots |
238 |
Connecting to a Tunnel
[INSERT SCREENSHOT: Connect_Process.png]
Before Connecting
Prerequisites: ✅ Tunnel Process Status = "Running"
✅ Tunnel Status = "Enabled"
✅ You are added to tunnel (by administrator)
✅ No other tunnel currently connected
⚠️ One Tunnel at a Time: You can only connect to ONE tunnel at a time.
Connection Steps
Step 1: Locate Tunnel
-
Find tunnel in table
-
Verify Process Status = "Running"
-
Verify Tunnel Status = "Enabled"
Step 2: Click Connect
-
Click "Connect" button for desired tunnel
-
Application initiates VPN connection
-
OpenVPN process starts in background
-
Connection established (typically 5-15 seconds)
Visual Feedback:
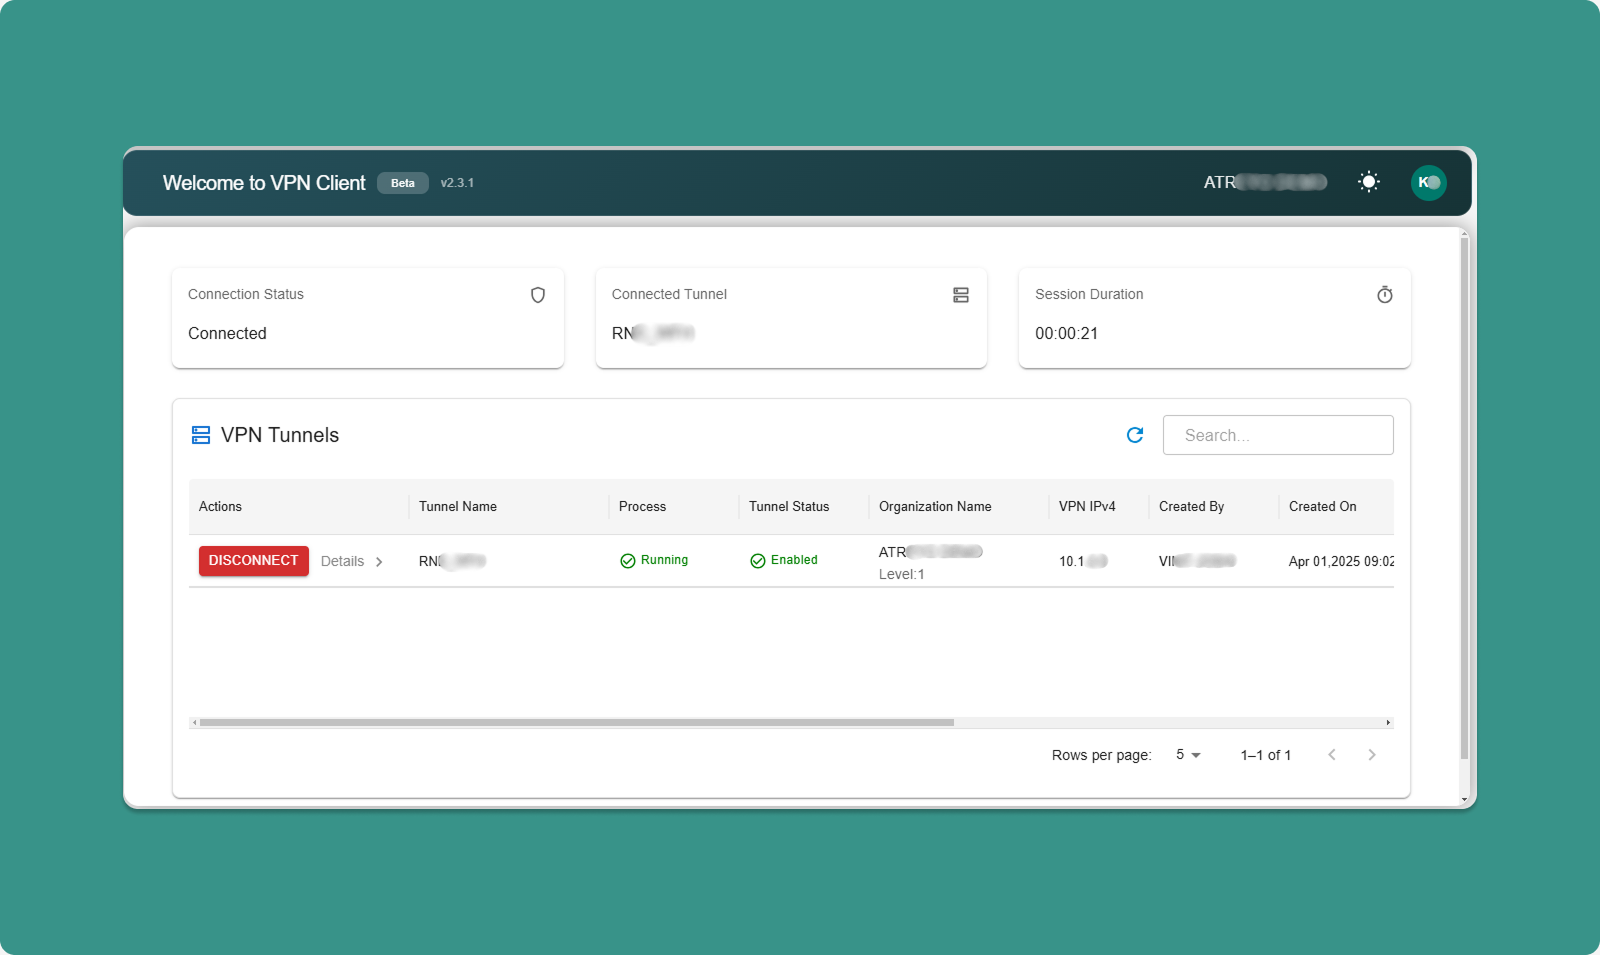
Step 3: Connected State
Once connected, three status cards appear at top of application:
Card 1: Connected Tunnel
-
Shows tunnel name you're connected to
-
Example: "Connected to: Factory_Production_VPN"
Card 2: Connection Details
-
Your VPN IP address
-
Example: "Your VPN IP: 10.8.0.25"
-
Gateway IP
-
Connection speed/status
Card 3: Session Duration
-
Time connected
-
Example: "Connected for: 00:45:23"
-
Updates in real-time
While Connected
What You Can Do:
-
✅ Access devices in tunnel via their VPN IPs
-
✅ Access devices' local networks (if Network Forwarding enabled)
-
✅ View connection details in status cards
-
✅ Monitor session duration
-
✅ Click "Details" to view device information
What You Cannot Do:
-
❌ Connect to other tunnels (must disconnect first)
-
❌ Close application (minimizes to system tray, stays connected)
Other Tunnels:
-
While connected, other "Connect" buttons are disabled (grayed out)
Disconnecting from Tunnel
Manual Disconnect
Step 1: Click Disconnect
-
Locate "Disconnect" button on active tunnel row
-
Click "Disconnect" button
-
VPN session cleanly closes
-
OpenVPN process terminates
Step 2: Disconnected State
After disconnection:
-
Status cards disappear from top
-
Button changes back to "Connect"
-
Other tunnels become available (buttons enabled)
-
Can connect to different tunnel
Effects:
-
Cannot access tunnel devices anymore
-
Local network access lost
-
VPN IP deallocated until next connection
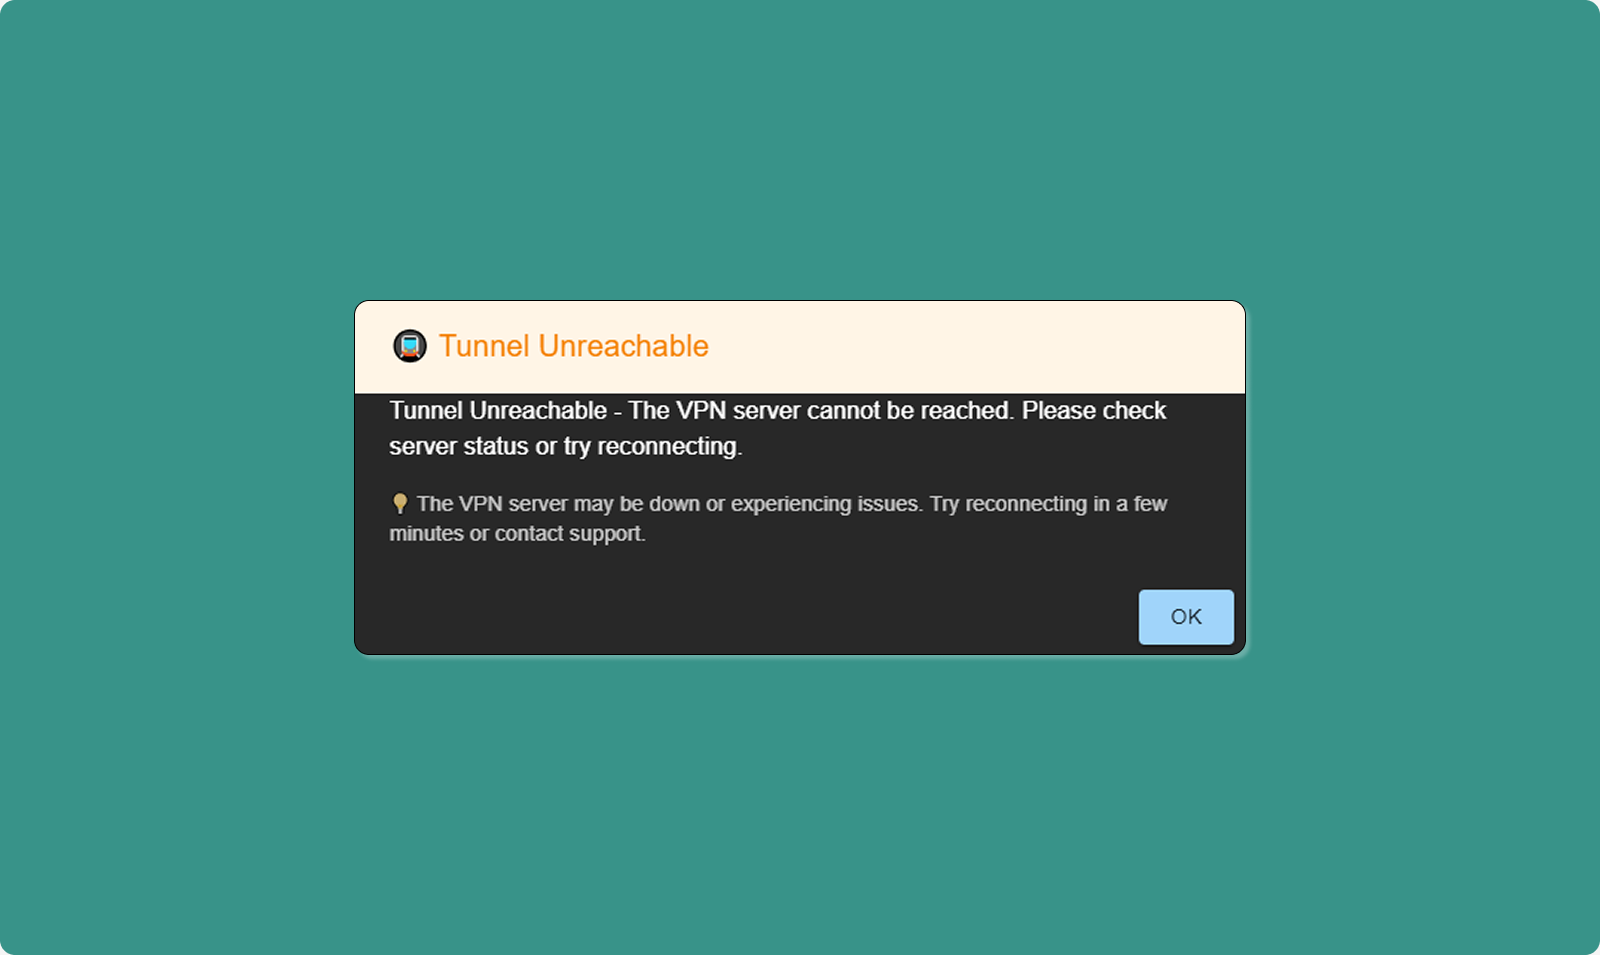
Automatic Disconnect
Scenarios Where App Auto-Disconnects:
1. Internet Connection Lost:
-
VPN requires active internet
-
If internet drops, VPN disconnects automatically
-
Notification appears: "Connection lost"
-
Attempt to reconnect when internet restores
2. Tunnel Stopped by Administrator:
-
Administrator stops tunnel process
-
All connections terminate
-
Notification: "Tunnel stopped by administrator"
3. Tunnel Disabled by Administrator:
-
Administrator disables tunnel
-
Process stops, all connections drop
-
Notification: "Tunnel disabled"
4. User Removed from Tunnel:
-
Administrator removes you from tunnel
-
Connection immediately terminates
-
Notification: "Access revoked"
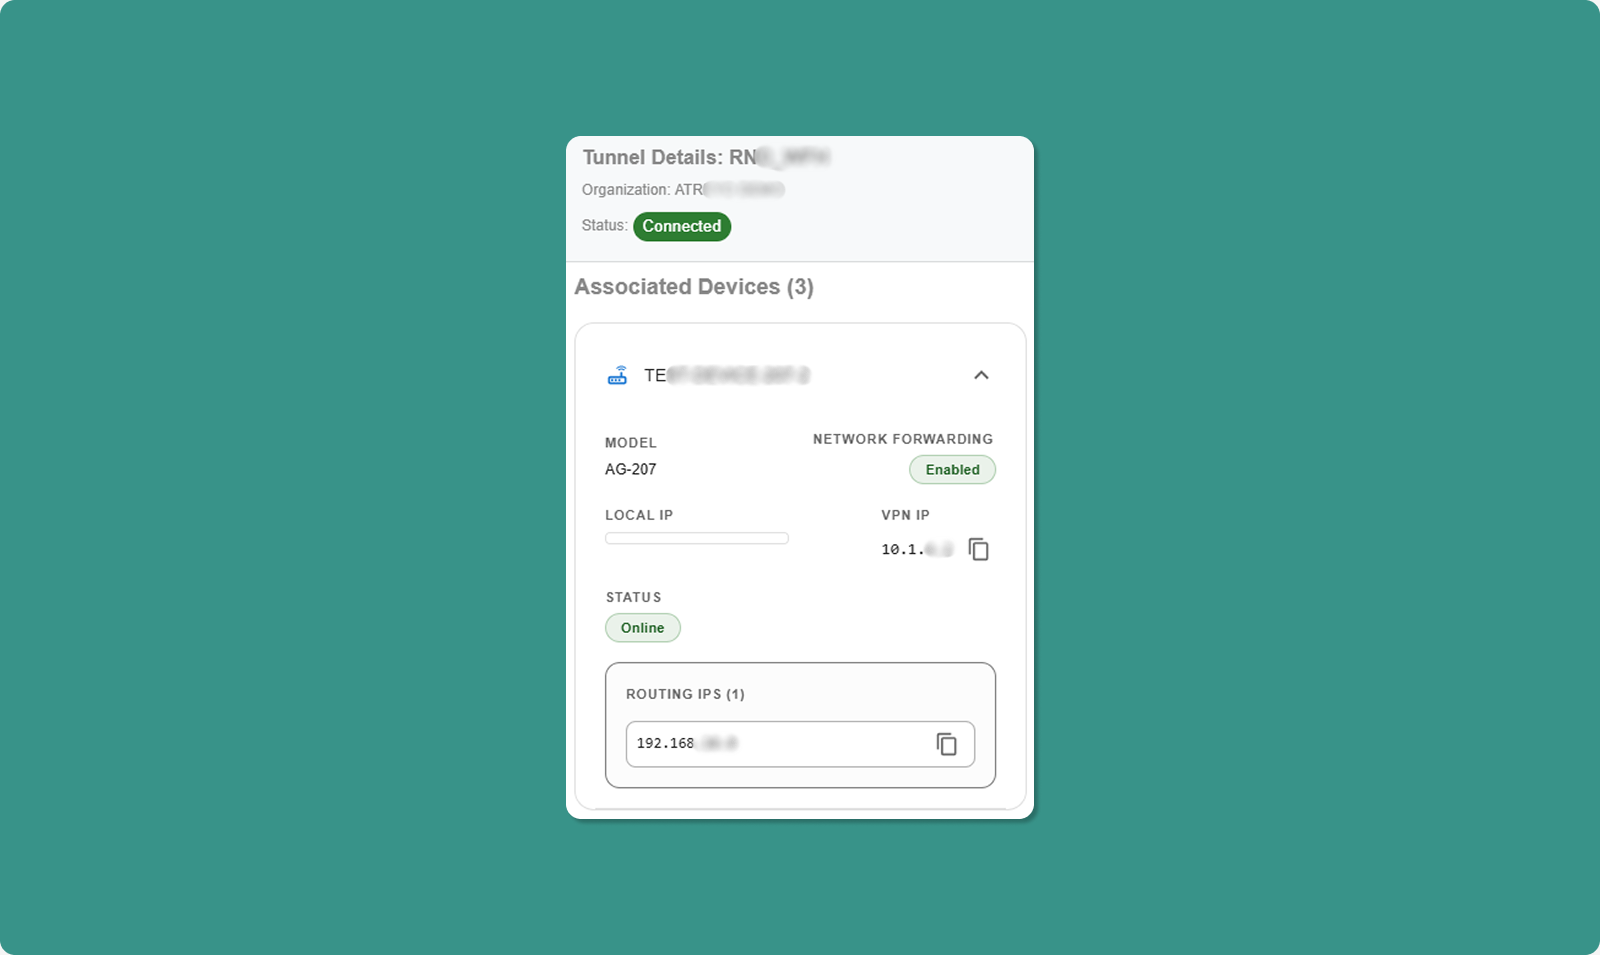
Device Details Sidebar
Click "Details" button to view devices in the tunnel.
Opening Details Sidebar
-
Locate tunnel in table
-
Click "Details" button (typically icon button)
-
Sidebar slides in from right side
Sidebar Contents
Header:
-
Tunnel name
-
Close button (X) to dismiss sidebar
Device List:
For each device, displays:
|
Field |
Description |
Example |
|
Device Model |
Hardware model name |
AG-702-LT-EU-V48 |
|
Local IP |
Device's LAN/WAN IP |
192.168.1.50 |
|
VPN IP |
Device's tunnel IP |
10.8.0.10 |
|
Network Forwarding |
Forwarding state |
Enabled or Disabled |
|
Connection Status |
Device online/offline |
Connected, Disconnected |
|
Routing IP |
Available network routes |
192.168.1.0 |
Understanding Routing IP
What is Routing IP?
-
Lists network ranges accessible through this device
-
Only shown when Network Forwarding = Enabled
-
CIDR notation (e.g., 192.168.1.0)
Example:
Device VPN IP: 10.8.0.10
Network Forwarding: Enabled
Routing IP: 192.168.1.0
What This Means:
-
You can access device at 10.8.0.10
-
You can also access any device on 192.168.1.x network (192.168.1.1 through 192.168.1.254)
-
Traffic routes through 10.8.0.10 to reach local network
Use Case:
Your Computer (VPN: 10.8.0.25)
↓
Connect to: 192.168.1.100 (PLC on device's LAN)
↓
Routes through: 10.8.0.10 (gateway device)
↓
Reaches: PLC at 192.168.1.100
Key Features of the Atra VPN App
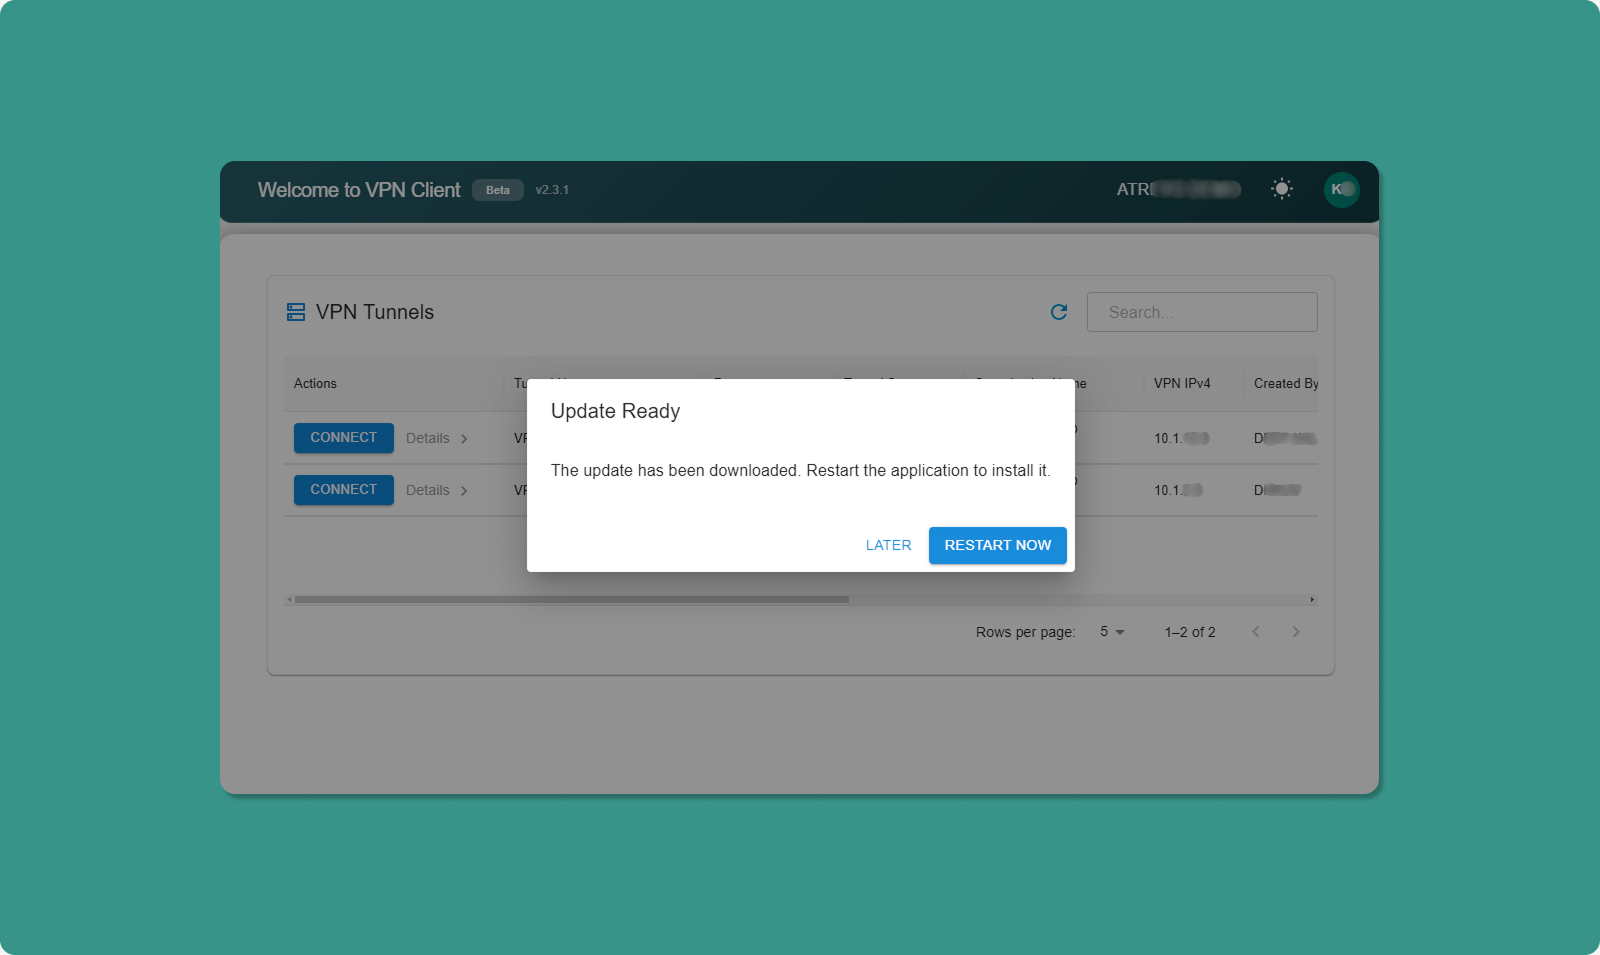
Auto-Updater
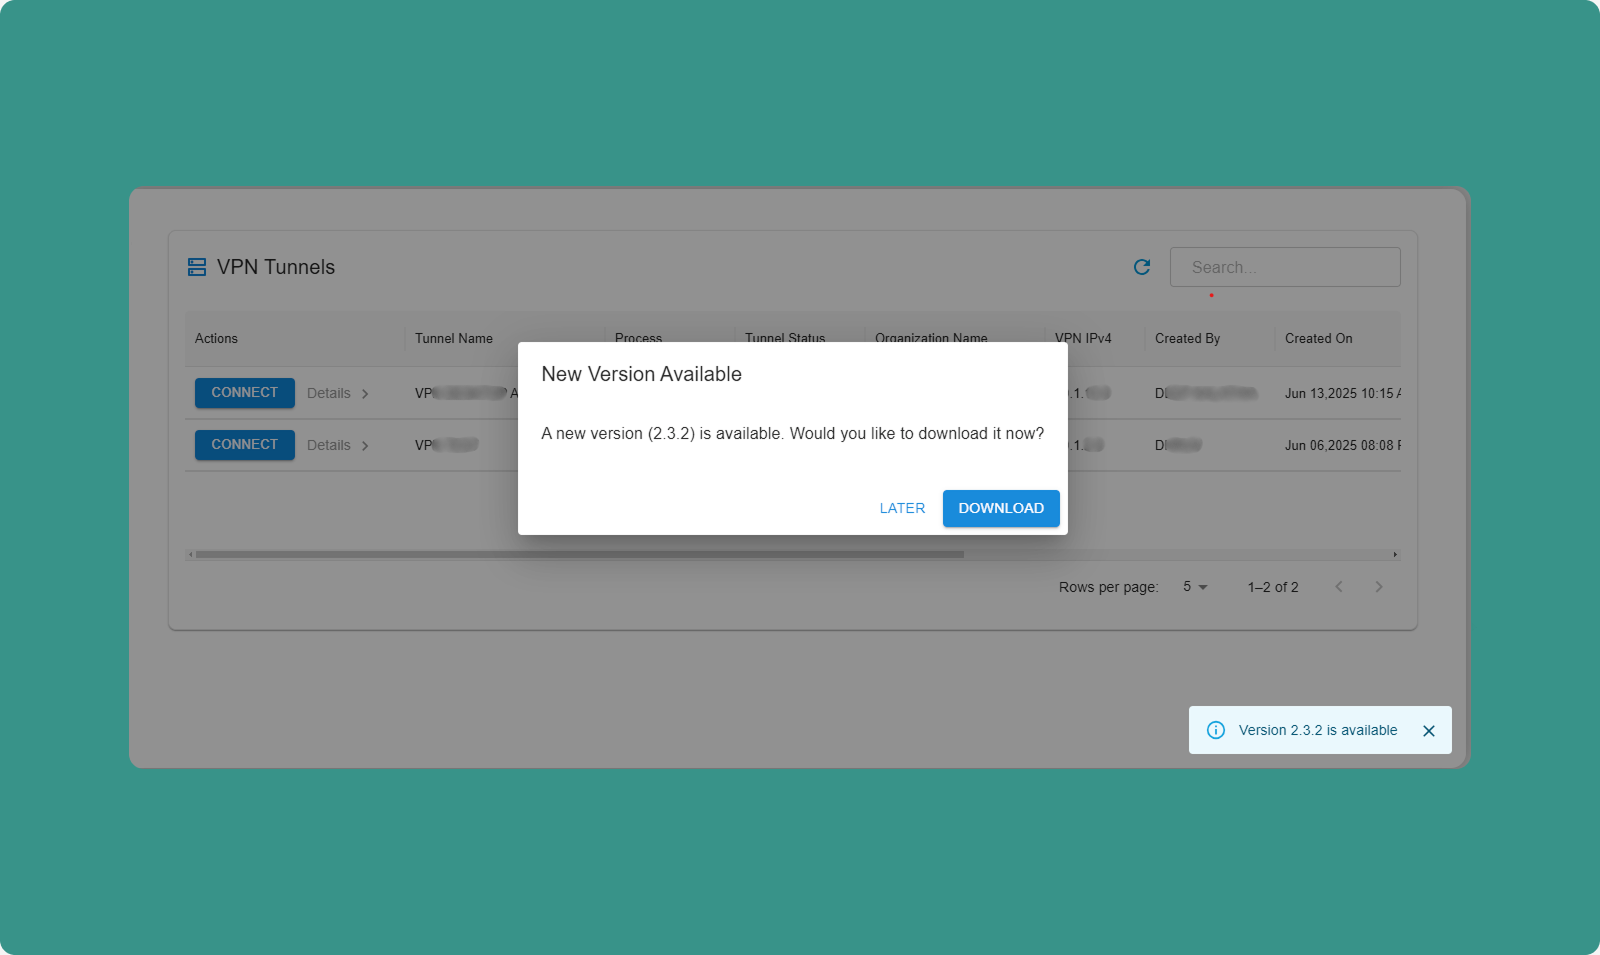
The app automatically checks for updates on launch.
Update Available:
-
Dialog appears: "Update Available"
-
Message shows for available version.
-
Options:
-
Download Now: Download update immediately
-
Skip: Skip for now, check again next launch
Download Process:
-
Click "Download Now"
-
Progress bar shows download status
-
When complete: "Restart to Update" button appears
-
Click "Restart to Update"
-
App closes and reopens with new version
Already Up to Date:
If you have the latest version:
-
Message appears: "You have the latest version"
-
No action needed
-
Dialog closes automatically
💡 Best Practice: Always keep app updated for latest features, security patches, and bug fixes.
Theme Toggle
Switching Themes:
-
Locate theme toggle (top-right area)
-
Click toggle switch
-
Interface switches immediately:
-
Light Mode: White background, dark text
-
Dark Mode: Dark background, light text
Persistence:
-
Your choice is saved automatically
-
Next time you launch app, your preferred theme applies
-
No need to reselect each time
Benefits:
-
Light Mode: Easier reading in bright rooms, office environments
-
Dark Mode: Reduces eye strain in low light, saves battery (OLED screens)
Troubleshooting Common Atra VPN App Issues
Installation Issues
Problem 1: Windows Protection Screen
Symptom: Blue screen: "Windows protected your PC"
Solution:
-
Click "More info" link
-
Click "Run anyway" button
-
Click "Yes" on UAC prompt (grant administrator permission)
Why: Standard Windows security for BETA apps. Safe to proceed.
Problem 2: App Not Launching After Install
Symptoms:
-
Double-click desktop icon, nothing happens
-
No application window appears
-
No error message
Solutions:
Check Task Manager:
-
Press Ctrl+Shift+Esc (open Task Manager)
-
Look for "AtraVPNClient.exe" in Processes tab
-
If found, right-click → End Task
-
Try launching again
Run as Administrator:
-
Right-click desktop icon
-
Select "Run as administrator"
-
Click "Yes" on UAC prompt
Reinstall:
-
Uninstall via Control Panel → Programs and Features
-
Delete remaining files from C:\Program Files\Atra VPN Client
-
Download fresh installer from Atra RMS
-
Reinstall following steps above
Login Issues
Problem 3: Invalid Credentials Error
Symptom: "Invalid email or password" message
Solutions:
Verify Credentials:
-
Confirm email is correct (check for typos)
-
Verify password is correct
-
Check Caps Lock is OFF
-
Try copying/pasting password from secure location
Reset Password:
-
Go to Atra RMS web platform
-
Use "Forgot Password?" link
-
Reset password
-
Use new password in VPN client
Check Account Status:
-
Verify account setup was completed
-
Confirm account hasn't been disabled
-
Contact administrator if needed
Problem 4: Auto-Login Not Working
Symptom: App asks for login every time despite successful previous login
Solutions:
Manual Logout Clears Auto-Login:
-
If you clicked Logout last time, auto-login disabled
-
Simply log in once to re-enable
Clear and Re-Login:
-
Log out if currently logged in
-
Close application completely
-
Reopen application
-
Log in manually
-
Auto-login should work on next launch
VPN Connection Issues
Problem 5: Cannot Connect to Tunnel
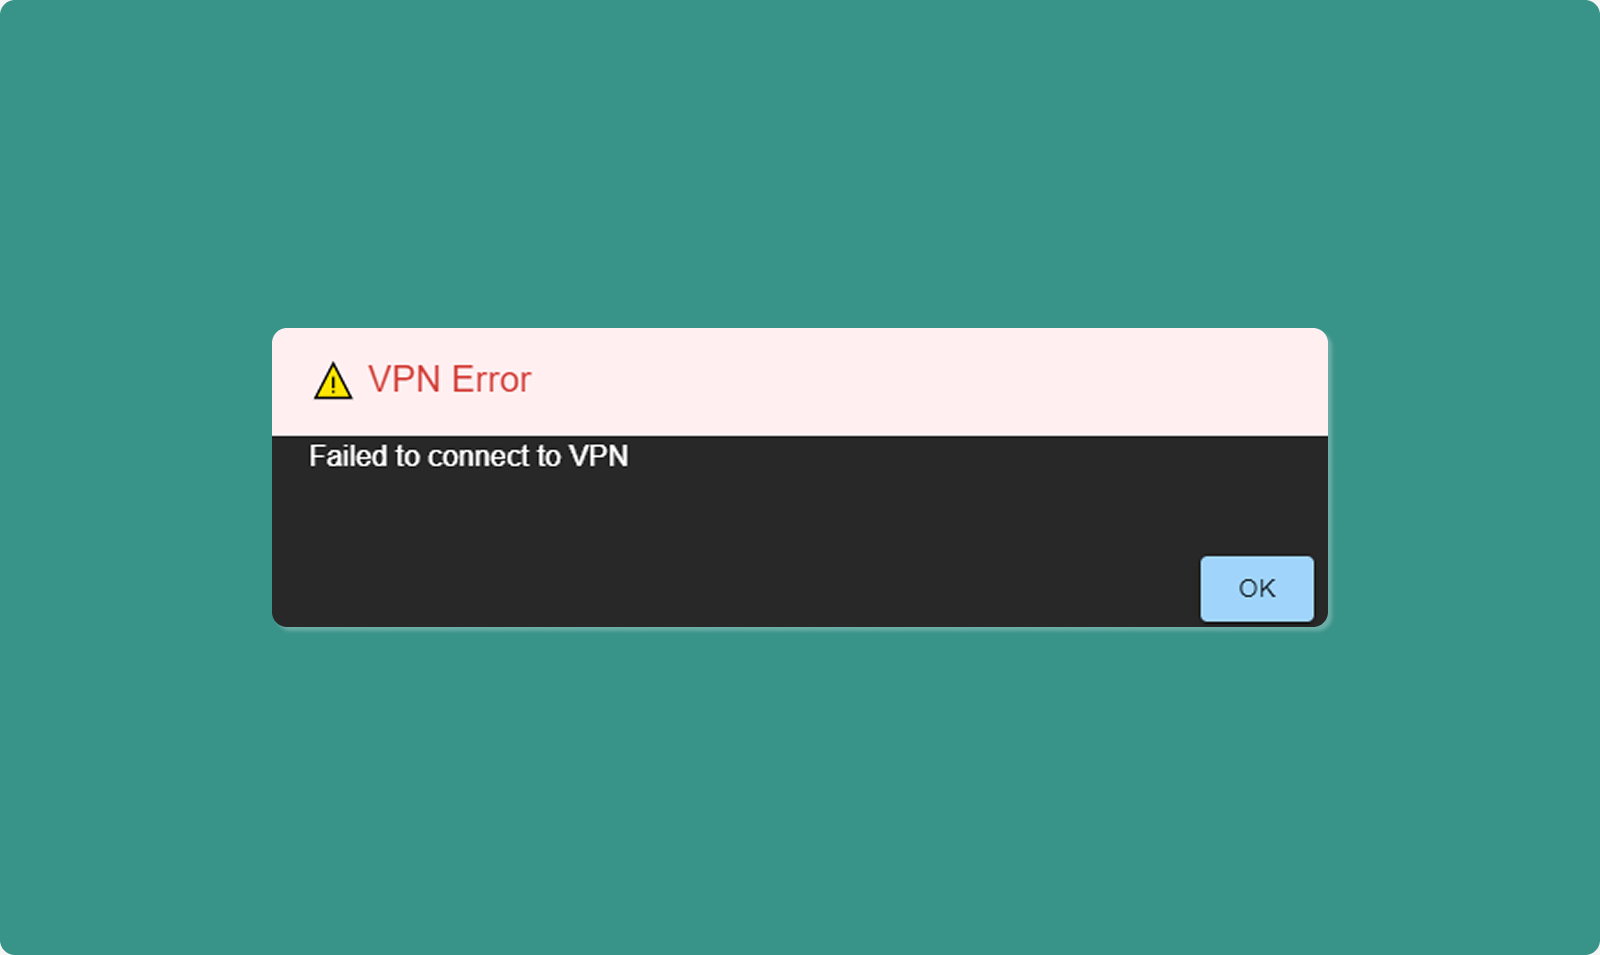
Symptom: Click "Connect" but connection fails
Solutions:
Verify Tunnel State:
-
Check Process Status = "Running" (not "Exited")
-
Check Tunnel Status = "Enabled" (not "Disabled")
-
If Exited: Contact administrator to start tunnel
-
If Disabled: Contact administrator to enable tunnel
Check Current Connection:
-
Verify you're not already connected to another tunnel
-
If connected elsewhere, disconnect first
-
Then try connecting to desired tunnel
Check Internet Connection:
-
Verify your computer has active internet
-
Try opening website in browser
-
Check Wi-Fi/Ethernet connection
-
Restart router if necessary
Contact Administrator:
-
Verify you're added to the tunnel
-
Confirm you haven't been removed
-
Check tunnel hasn't been deleted
Problem 6: Connection Drops Frequently
Symptom: Connection established but drops after few minutes
Solutions:
Check Internet Stability:
-
Test internet connection quality
-
Run speed test (speedtest.net)
-
Check for packet loss (ping test)
-
Switch to wired connection if using Wi-Fi
Check Firewall/Antivirus:
-
Temporarily disable firewall
-
Test VPN connection
-
If works, add VPN client to firewall whitelist
-
Re-enable firewall
Router Configuration:
-
Ensure UDP port 1194 is open (OpenVPN default)
-
Check router isn't blocking VPN traffic
-
Update router firmware if outdated
Network Congestion:
-
Close bandwidth-heavy applications
-
Pause downloads/uploads
-
Disconnect other devices from network temporarily
-
Test connection during low-usage period
Problem 7: Device Not Showing in Sidebar
Symptom: Open Details sidebar but expected device missing
Solutions:
Verify Device Added:
-
Check Atra RMS web interface
-
Navigate to tunnel Overview page
-
Check Devices tab
-
Confirm device is in the list
-
If missing, administrator must add it
Refresh Application:
-
Click Refresh icon (top of VPN client)
-
Wait for data to update
-
Check Details sidebar again
General Issues
Problem 8: App Stuck or Frozen
Symptom: Application unresponsive, cannot click anything
Solutions:
Force Close:
-
Press Ctrl+Alt+Delete
-
Select Task Manager
-
Find "AtraVPNClient.exe"
-
Right-click → End Task
-
Relaunch application
System Restart:
-
Close all applications
-
Restart computer
-
Launch VPN client after restart
Problem 9: Still Not Resolved
Contact Atreyo Support:
Email: support@atreyo.io
Information to Include:
-
Your name and email
-
Organization name
-
App version number (from top-left of dashboard)
-
Operating System (Windows 10/11, build number)
-
Detailed description of issue
-
Steps to reproduce the problem
-
Screenshots of error messages
-
Log files (if accessible)
Atra VPN Desktop App FAQs
Q: Where can I download the Atra VPN Client?
A: Log in to Atra RMS web interface → VPN section → Download button (top-right corner). Currently available for Windows 10/11 only.
Q: Is the Atra VPN Client available for macOS or Linux?
A: Not currently. The app is only available for Windows 10/11 (64-bit). macOS and Linux versions are under development.
Q: Why do I see a Windows protection warning during installation?
A: This is a standard Windows SmartScreen security check for BETA applications. The Atra VPN Client is developed and signed by Atreyo and is safe. Click "More info" → "Run anyway" to proceed with installation.
Q: Do I need different login credentials for the VPN Client?
A: No. Use the same email and password as your Atra RMS web platform account.
Q: Can I connect to multiple VPN tunnels at once?
A: No. You can only connect to ONE tunnel at a time. All other tunnels will be disabled while one is active. Disconnect first to switch tunnels.
Q: Can the app work without the internet?
A: No. The Atra VPN Client requires an active internet connection to authenticate your account and establish VPN tunnels.
Q: What should I do if the app is not working properly?
A: First, try restarting the app. If the problem persists, refer to the Troubleshooting section above. For unresolved issues, contact Atreyo Support with details and log files.
Q: Can I run multiple instances of the Atra VPN Client?
A: No. The app only allows one instance to run at a time. If the app is already open, you cannot launch another window.
Q: What happens if I lose the internet while connected to VPN?
A: The app will automatically disconnect for security. When the internet is restored, you'll need to manually reconnect to the tunnel.
Q: How do I access devices through the VPN?
A: Once connected, use the device's VPN IP address (shown in Details sidebar) to access it. If Network Forwarding is enabled, you can also access devices on the device's local network using their local IP addresses.