View and Manage Users
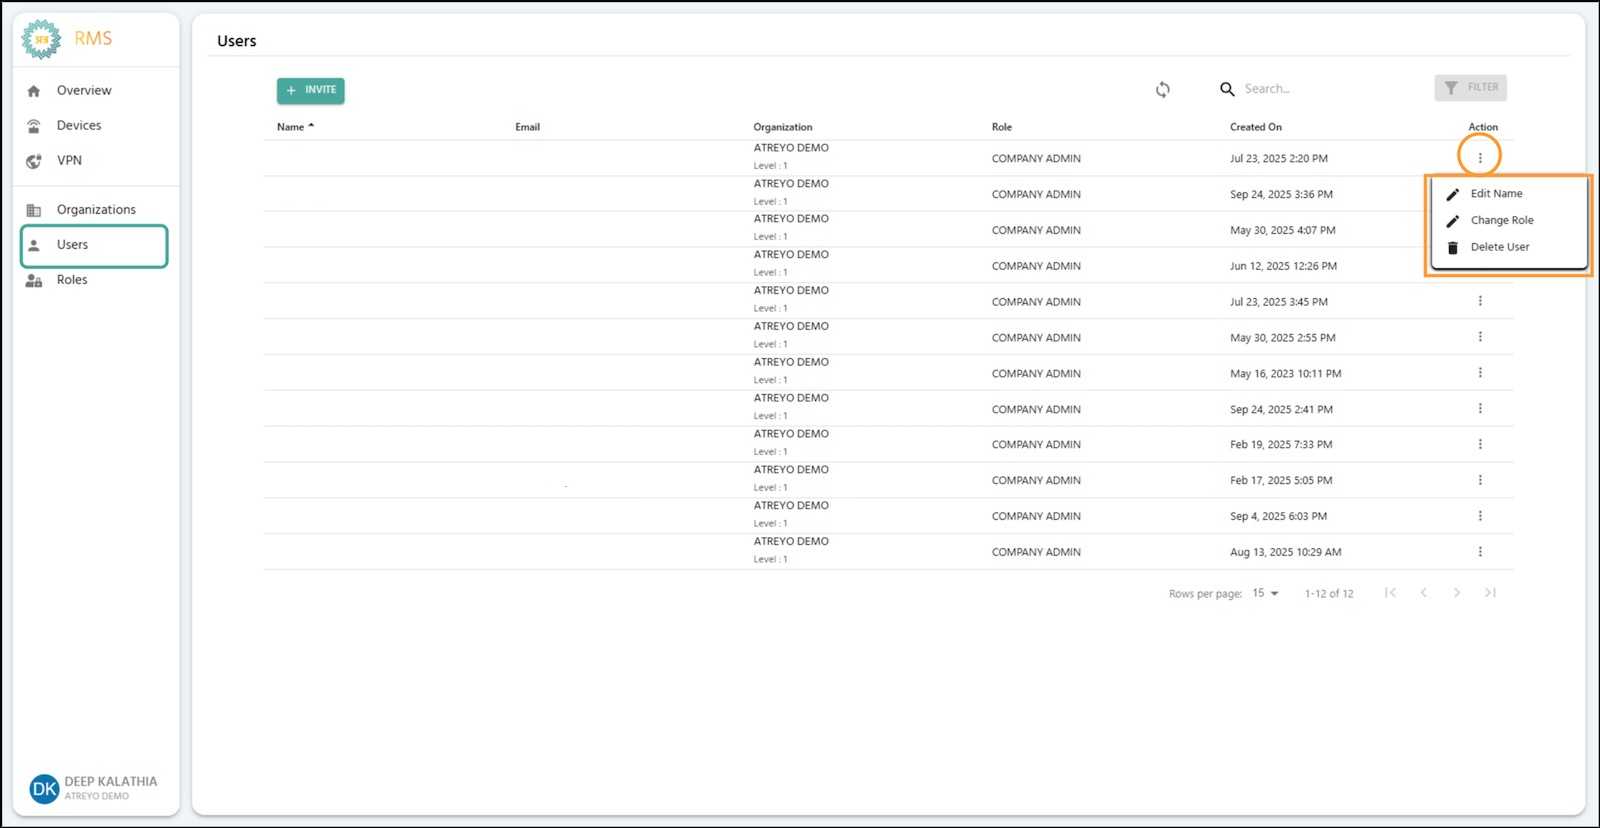
The Users tab is located in the left sidebar. It allows you to view, edit usernames, change user roles, and invite new users from your Atra-RMS account.
🛠️ Main Users Interface Actions

The main UserUsers interface provides several actions to manage Users:
📜 Users List (Table View)
organizations.
The list displays essential information about all Users.
Description
Name
The user's full name.
Email
The user's login email address.
Organization
The organization the user belongs to, including its level (e.g., ATREYO DEMO Level-1).
Role
The specific role assigned to the user (e.g., COMPANY ADMIN).
Created On
The date and time the user was invited.
🛠️ Individual User
Interface Actions

Next to each user entry, there is an Action button (three vertical dots) that opens a menu for specific user management tasks:
Edit Name: Modify the user’s name.
Change Role: Select and assign a different role to the user.
Delete User: Permanently delete the user’s account.
Note: Alogged-in userispreventedfrom performing criticalself-managementactions, such asdeletingtheir own account orchangingtheir assignedrole.
The data includes information from your current organization and all immediate child organizations (i.e., the 2nd-level organizations).
🧭 Table Navigation

|
Action |
|
Purpose
Rows+INVITE per pageButton
AdjustTop-left the(Teal)
Invite shownnew onuser theto screen.Atra RMS
TotalRefresh CountButton
DisplaysTop-right
Manually ofupdate users.user list
Search Bar
Center
Filter by name, email, organization, or role
Filter
Top-right
Filter users by invitation status, role, and organization
Table Columns

Column
Description
Example
Name
User's name with status icon
👤 Jane Doe, ⏳ John Smith, ⚠️ Mike Johnson
User's login email address
jane.doe@company.com
Organization
Org name with level
ATREYO Level-1
Role
Assigned permission set
COMPANY ADMIN, MANAGER
Created On
Invitation date/time
Dec 20, 2025, 3:45 PM
Scope: Data includes users from your current organization and all immediate child organizations.
Name Column with Status Icons
The Name column displays user status through visual icons alongside the user's name.
Icon Types and Meanings
Icon 1: Account Active (✓ User Icon - Blue)
Appearance:
Blue user icon (👤)
User name displayed normally
No additional text below name
Meaning:
User successfully created their account
Account setup completed
User can log in to Atra RMS
Icon 2: Account Creation Pending (⏳ Clock Icon - Yellow)
Appearance:
Yellow clock icon (⏳)
User name displayed normally
No additional text below name
Meaning:
User has been invited
Invitation email sent successfully
User has NOT yet completed account setup
Invitation link still valid (within 24 hours)
What Happens Next:
User receives invitation email
User clicks "Set Up Password" link
User creates password
Icon changes to ✓ (Account Active)
Icon 3: Invitation Expired (⚠️ Warning Icon - Red)
Appearance:
Red warning icon (⚠️)
User name displayed
Text below name: "Invitation has been expired"
Re-Send button below caption (teal button with arrow →)
Meaning:
User was invited but did not complete setup
24-hour invitation validity period has expired
User cannot use old invitation link
Administrator/User must resend invitation
Re-Send Button Functionality

When invitation expires, a Re-Send button appears below the user's name.
Label: "Re-Send →" (with arrow symbol)
Colour: Teal
Location: Directly below "Invitation has been expired" text
Purpose: Send new invitation email to user
How to Resend Invitation
Steps:
Locate Expired User
Find user with ⚠️ warning icon
Look for "Invitation has been expired" text
Click Re-Send Button
Click the "Re-Send →" button below user name
System Processing
New invitation email sent to user's email address
New 24-hour validity period starts
User status updates in table
Visual Update
Icon changes from ⚠️ (expired) to ⏳ (pending)
"Invitation has been expired" text disappears
Re-Send button disappears
User now shows as "invited, pending account setup"

What Happens After Resending
User Receives:
New invitation email with fresh link
Subject: "Invitation to Join Atra RMS"
New 24-hour validity period
Old Invitation Link:
Previous invitation link becomes invalid
User cannot use old link even if they still have the email
Only new link will work
User Must:
Check email for new invitation
Click "Set Up Password" button in new email
Complete account setup within 24 hours
Create password and activate account
If User Completes Setup:
Icon changes to ✓ (Account Active)
User can now log in
Invitation system complete
Individual User Actions
Each user row has an Action button (three vertical dots ⋮) that opens a menu with management options.

Action
Purpose
Permission Required
Edit Name
Modify user's display name
Users Update
Change Role
Assign different role
Users Update
Delete User
Permanently remove user
Users Delete
Action: Edit Name
Modify a user's display name (does not affect email/login).

Steps:
Click Action button (⋮) next to user
Select "Edit Name"
Dialog opens with current name
Type new name
Click SAVE to confirm or CLOSE to discard
Input Rules:
Length: 3-40 characters
Allowed: Letters, numbers, spaces, periods (.), underscores (_), hyphens (-)
Not allowed at start/end: Period, underscore, hyphen
No consecutive special characters
Examples:
✅ Jane Doe
✅ Product-Manager
✅ User_123
❌ _Jane (starts with underscore)
❌ User..Name (consecutive periods)
Action: Change Role
Assign a different role to modify user's permissions.

Steps:
Click Action button (⋮) next to user
Select "Change Role"
Dialog displays available roles as radio buttons
Select new role (only one can be active)
Click SAVE to apply or CLOSE to abort
Available Roles:
Displays all roles created for the user's organization
Examples: ADMIN, MANAGER, VIEWER, custom roles
Effect:
User's permissions immediately update
User may need to refresh browser to see new capabilities
Previous role's permissions are revoked
⚠️ Caution: Changing a user's role affects their access to devices, VPN, and other resources. Verify the new role has appropriate permissions before saving.
Action: Delete User
Permanently remove a user account from Atra RMS.

Steps:
Click Action button (⋮) next to user
Select "Delete User"
Confirmation dialog appears
Click CONFIRM to delete or CANCEL to abort
⚠️ Critical Warnings:
Deletion is Permanent:
User account is immediately deleted
User cannot log in after deletion
Action cannot be undone
User must be re-invited to regain access
VPN Tunnel Restriction:
Cannot delete users currently in any VPN tunnel
Must first remove user from all VPN tunnels
Then deletion will be allowed
Audit Trail Preserved:
User's name remains in "Created By" and "Registered By" fields
Self-Management Prevention:
Logged-in user cannot delete their own account
Logged-in user cannot change their own role
Prevents accidental self-lockout

Control
Purpose
Options
Rows per page
Adjust visible users
5, 10, 15, 20,25
Total Count
Display total users
"Showing 1-5 of 25"
Page Navigation
Move between pages.pages
Previous, Next, Last, First
✏️ Edit Name
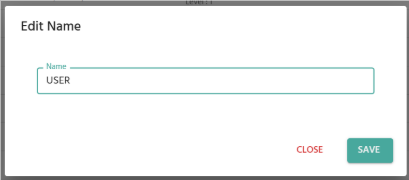
Enter the New Name: Click inside the text field displaying the current name, delete it, and type the new user name.
Confirm the Change: Click the SAVE button to update the user’s name.
🔄 Change Role

🗑️ Delete User

Purpose: Permanently delete the user account from Atra-RMS.
CONFIRM: Clicking this button will permanently delete the selected user. This action is irreversible.
Ensure you have selected the correct user before clicking CONFIRM.
User deletion isrestrictedif the user is currently in anyVPN Tunnel. You must first remove the user from all associated VPN Tunnels before deletion.
After deletion, the user’s name willstill appearin fields such as"Created By"or"Registered By"for any items they previously created or registered.