Configuration manual
Thermolog can be configured in two ways. One by using the buttons and the menu that will appear on the display, or by using Modbus and commands from the dedicated Thermometer PC application or any other software with Modbus function. The offered device has default parameters and you should set them according to your requirements.
It is possible to configure:
- the display method
- brightness from 1 to 15 or automatic
- Modbus parameters
- date and time
- sensor calibration
Configuration by buttons
Setting the time on the Thermolog ATL-V3-TH:
- Long press the OK button to enter the time setting mode.
- Use the Left (L) and Right (R) buttons to adjust the time.
- Single press the OK button to switch between setting up minutes, hours, days, and so on.
- This allows you to easily navigate through the different time units and adjust them accordingly.
Attention. Thermolog has the ability to calibrate the clock. In the last menu there is the possibility of acceleration and deceleration. It is best to leave the values as the default, which is 0.
Switching the display mode:
- Press either the Right (R) or Left (L) button.
Setting Brightness of display and Modbus Parameter:
Setting temperature and humidity alert:
- To set the minimum or maximum temperature of the sensor for low or high temperatures, use the OK button along with the Left (L) button.
- Use the Left (L) and Right (R) buttons to adjust the temperature.
- Single press the OK button to switch between low and high temperature.
Using the program on a PC
Thermolog has a dedicated application that makes configuration easy and allows exporting LOG files to Excel format. Thermometer 1.04 does not require installation. It works on computers running Windows 10 and later.
Setting up Thermolog with the Thermometer App
To configure Thermolog, you need to connect a converter to RS485 interface to the USB port of your computer. You can use ADI-501 converter made by Atreyo or any other make. After correctly connecting the RS485 signals between the converter and Thermolog and after connecting to the computer, start the Thermometer application. Then select the port and serial port paramneters. By default, Thermolog is set to Baud rate 9600, Data bits 8, Parity: none, Stop bits: 1, Flow control: none.
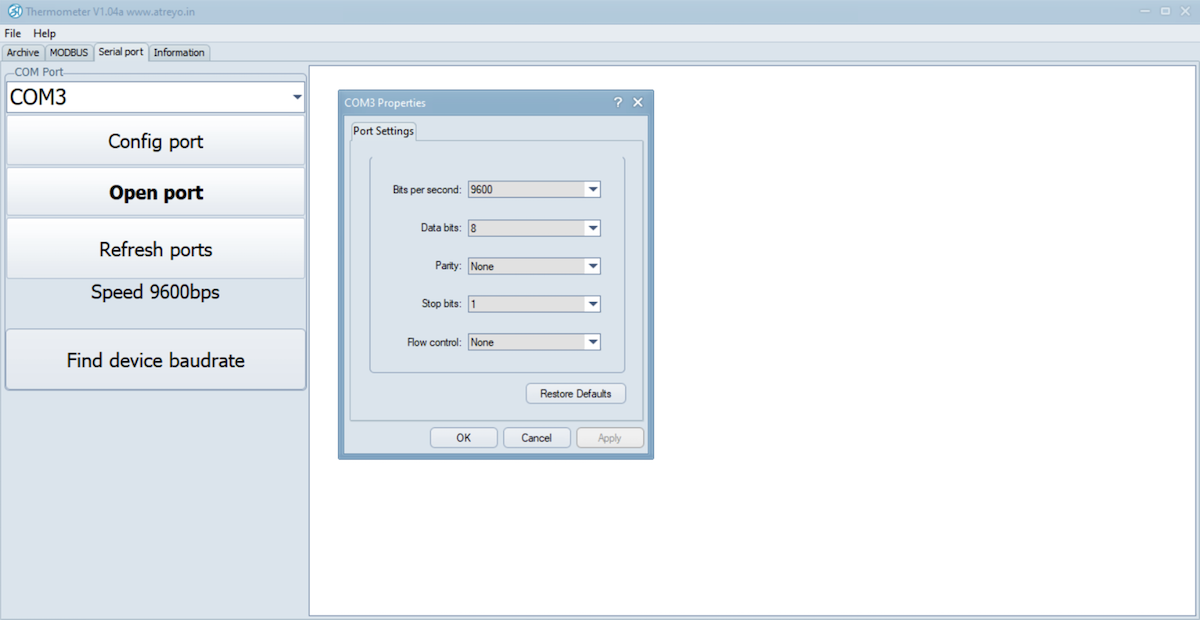
After making the settings, click Open port.
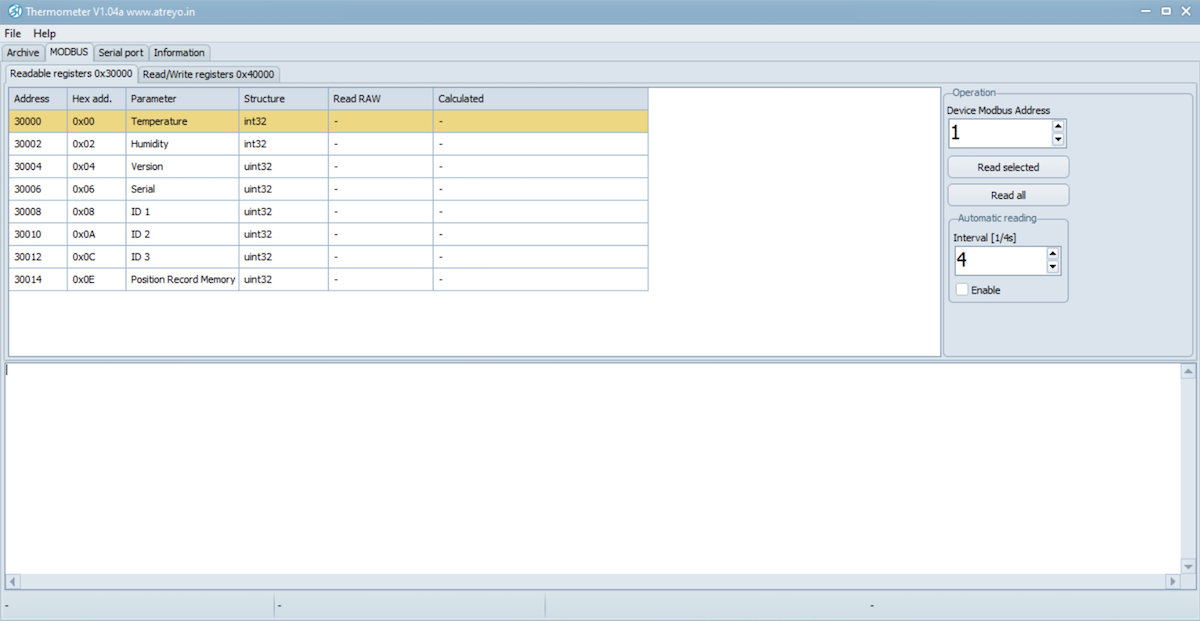
Under Modbus>Redable registers, we have access to the data read from Thermolog.
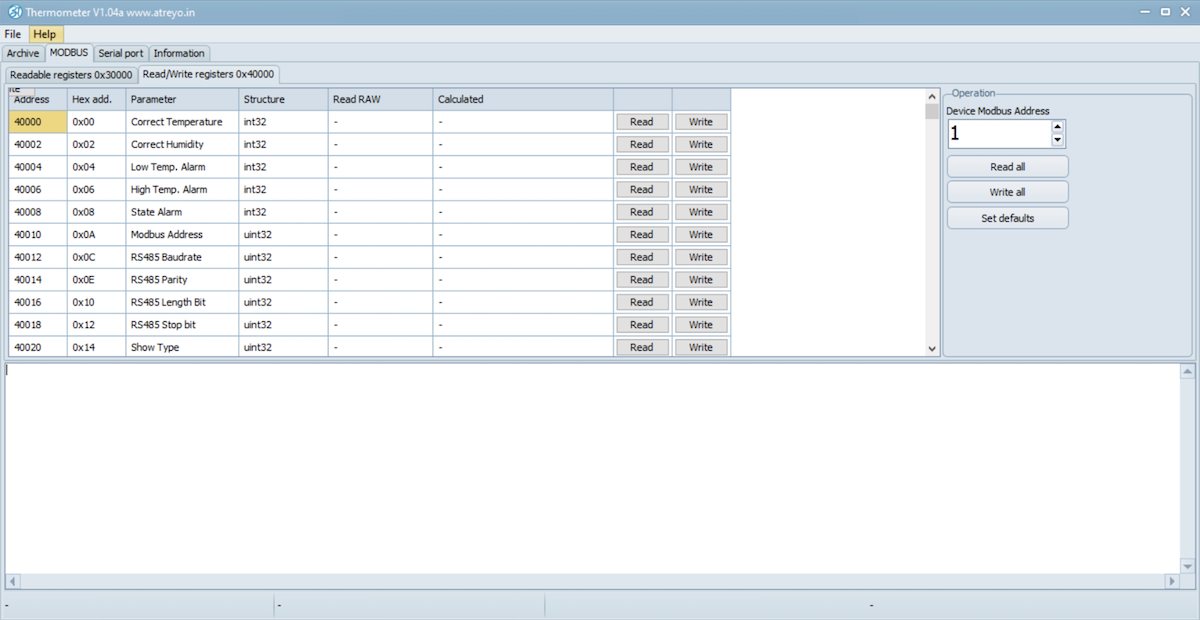
Under Modbus>Read/Write, we also have the option to make changes to the settings.
We can make config of:
- time and date
- temperature alarm range
- humidity alarm range
- make calibration
- set the serial port and Modbus address
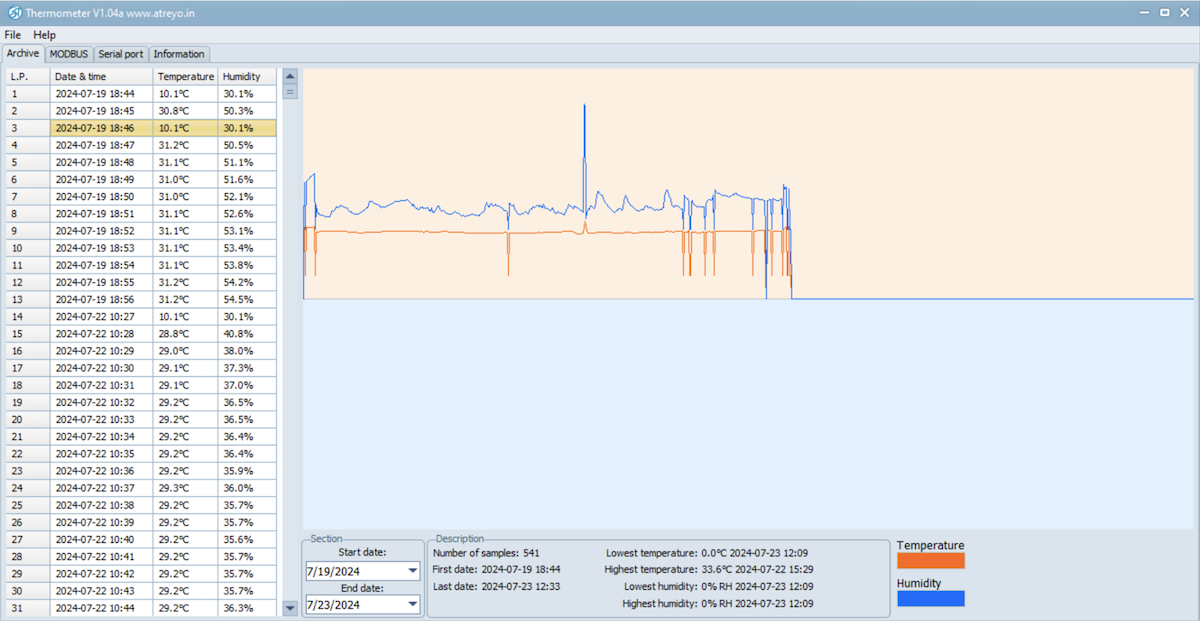
Preview data and export to Excel
To open a preview of data from Thermolog, you need to select File>open in the top menu and open the previously ripped Termdump.BIN file. A graphical representation of the temperature measurements will be shown.
To export data to an Excel file, it is necessary to have Excel installed on your computer.