Getting Started with the Atra VPN App
Application Dashboard Overview
The main dashboard has three sections:
Top Bar:
-
App Version: Current version number (e.g., v1.2.3)
-
Organization Name: Your associated organization
-
Theme Toggle: Switch between light/dark mode
-
Profile Avatar: Access account menu
Middle Section:
- Search Bar: Filter tunnels by name/organization
- Refresh Icon: Manually update tunnel list
- Table Navigation: Rows per page, page controls
Main Area:
-
VPN Tunnels Table: List of available tunnels
Top Bar Elements

1. App Version
Display: Top-left corner
Format: "Atra VPN Client v1.2.3"
Purpose: Shows current installed version
When to Check:
-
Troubleshooting issues
-
Verifying you have latest version
-
Reporting bugs to support
2. Associated Organization
Display: Below app version
Format: "Organization: [Your Org Name]"
Purpose: Confirms which organization's tunnels you see
What This Means:
-
You see tunnels created in your organization
-
You see tunnels your organization has access to
-
Cannot see tunnels from unrelated organizations
3. Theme Toggle
Location: Top-right area
Options: Light Mode | Dark Mode
How to Use:
-
Click theme toggle switch
-
Interface immediately switches themes
-
Preference saved automatically
-
Applied on next launch
Benefits:
-
Light Mode: Better for bright environments
-
Dark Mode: Reduces eye strain in low-light conditions
4. Profile Avatar

Location: Top-right corner
Icon: Circle with user initials or icon
-
Email Address (display only)
-
Organization Name (display only)
-
Logout option (click to sign out)
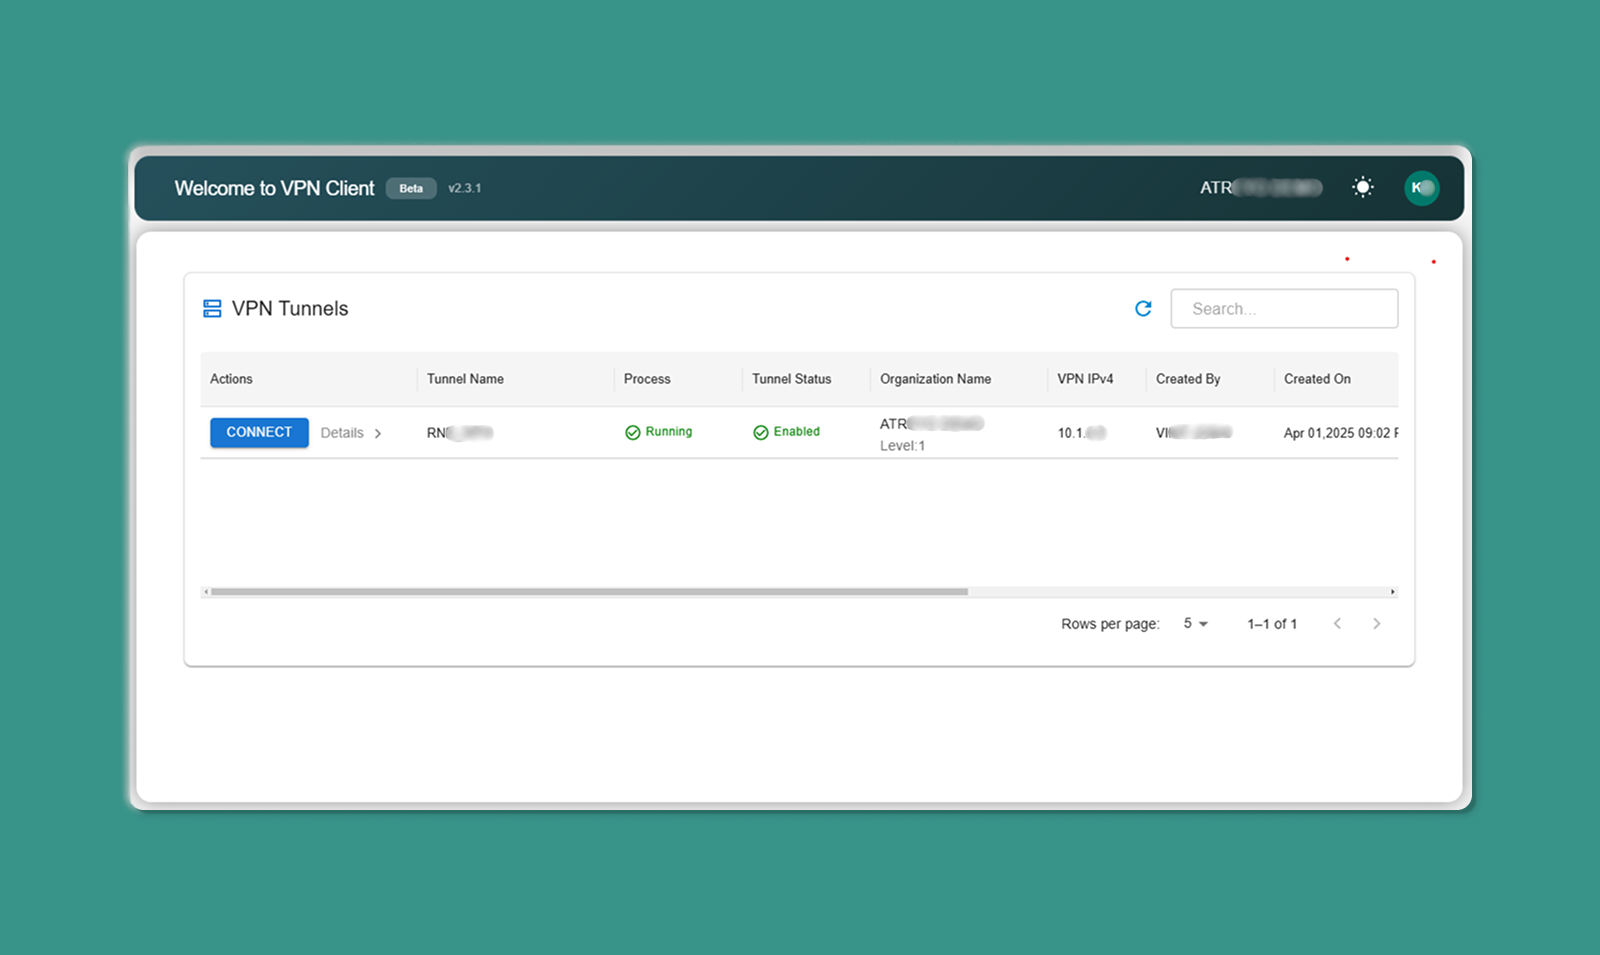
VPN Tunnels Table
The main table displays all VPN tunnels you have access to.
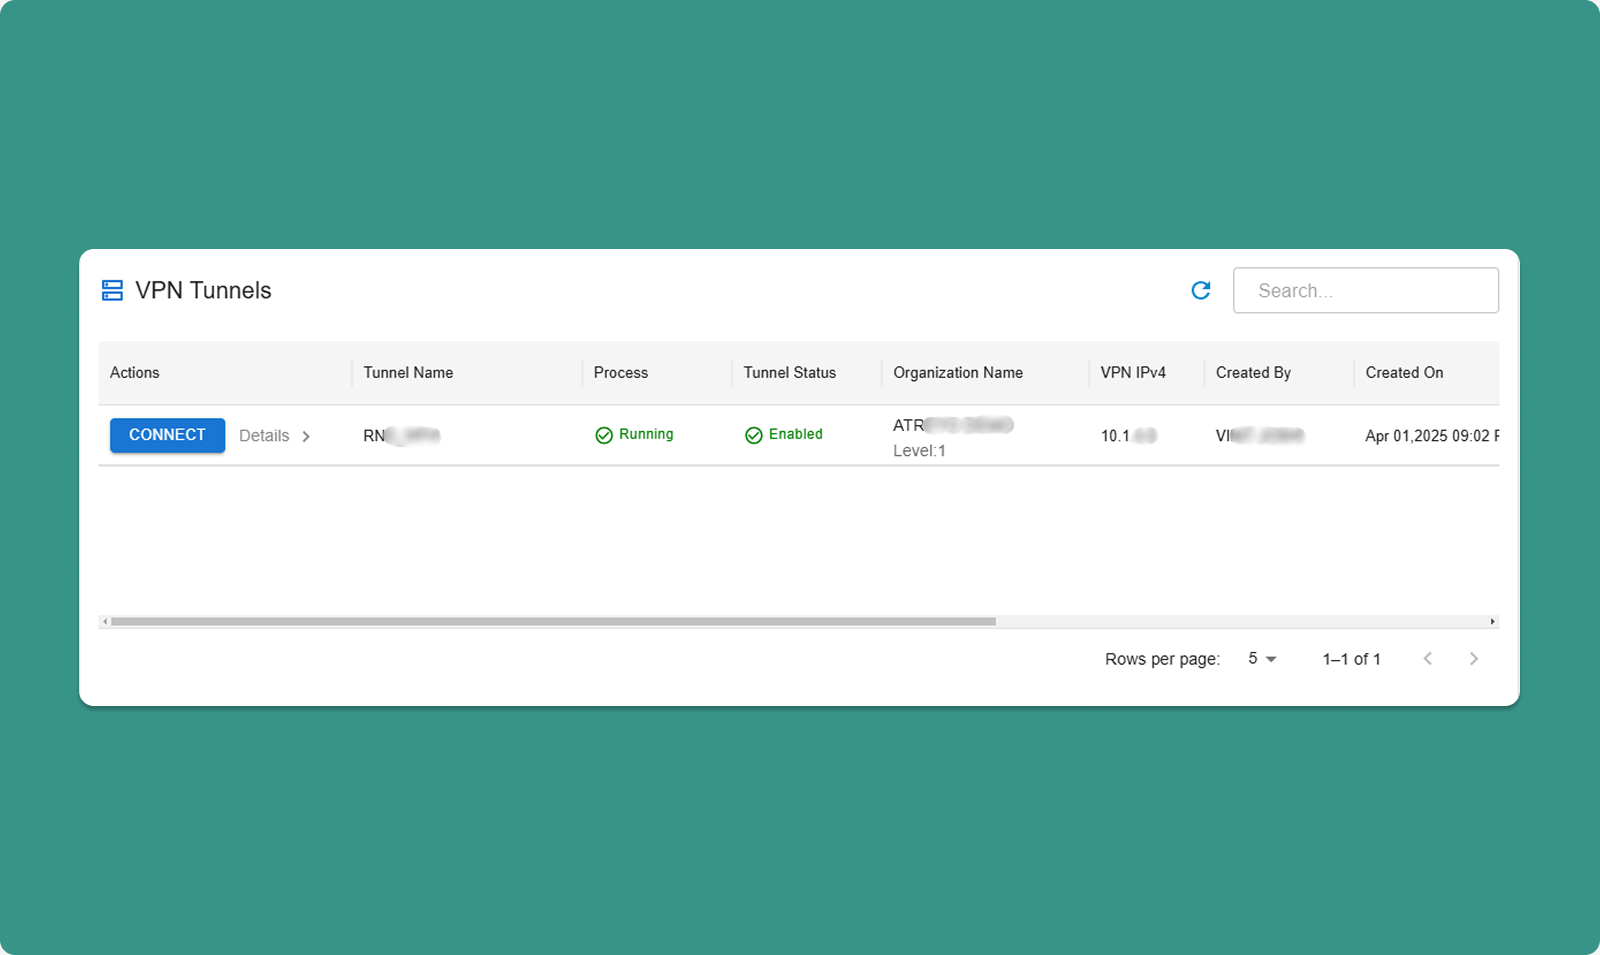
Table Search & Refresh
Search Bar:
-
Type keywords to filter tunnels
-
Searches: Tunnel name, organization, created by
-
Real-time filtering (results update as you type)
Refresh Icon:
-
Click to manually update tunnel list
-
Useful after tunnels are created/deleted in web interface
-
Rows per page: 10, 25, 50, 100
-
Total Count: "Showing 1-10 of 25 tunnels"
-
Page Navigation: Previous, Next, page numbers
Table Columns
|
Column |
Description |
Values |
|
Connect Button |
Connect/disconnect from tunnel |
"Connect" or "Disconnect" |
|
Details |
Opens sidebar with device info |
Button with icon |
|
Process Status |
VPN server process state |
Running, Exited |
|
Tunnel Status |
Management state |
Enabled, Disabled |
|
Organization Name |
Tunnel's organization |
ATREYO DEMO |
|
Organization Level |
Hierarchy level |
Level: 1, 2, 3 |
|
VPN IPv4 |
Tunnel gateway IP |
10.8.0.1 |
|
Created By |
Creator's email |
test@atreyo.in |
|
Created On |
Creation date |
2025-09-15 |
|
Total Users |
Users in tunnel |
10 |
|
Total Devices |
Devices in tunnel |
5 |
|
Max Clients |
Maximum capacity |
253 |
|
Allocated Clients |
Current users + devices |
15 |
|
Remaining Clients |
Available slots |
238 |
Connecting to a Tunnel
[INSERT SCREENSHOT: Connect_Process.png]
Before Connecting
Prerequisites: ✅ Tunnel Process Status = "Running"
✅ Tunnel Status = "Enabled"
✅ You are added to tunnel (by administrator)
✅ No other tunnel currently connected
⚠️ One Tunnel at a Time: You can only connect to ONE tunnel at a time.
Connection Steps
Step 1: Locate Tunnel
-
Find tunnel in table
-
Verify Process Status = "Running"
-
Verify Tunnel Status = "Enabled"
Step 2: Click Connect
-
Click "Connect" button for desired tunnel
-
Application initiates VPN connection
-
OpenVPN process starts in background
-
Connection established (typically 5-15 seconds)
Visual Feedback:
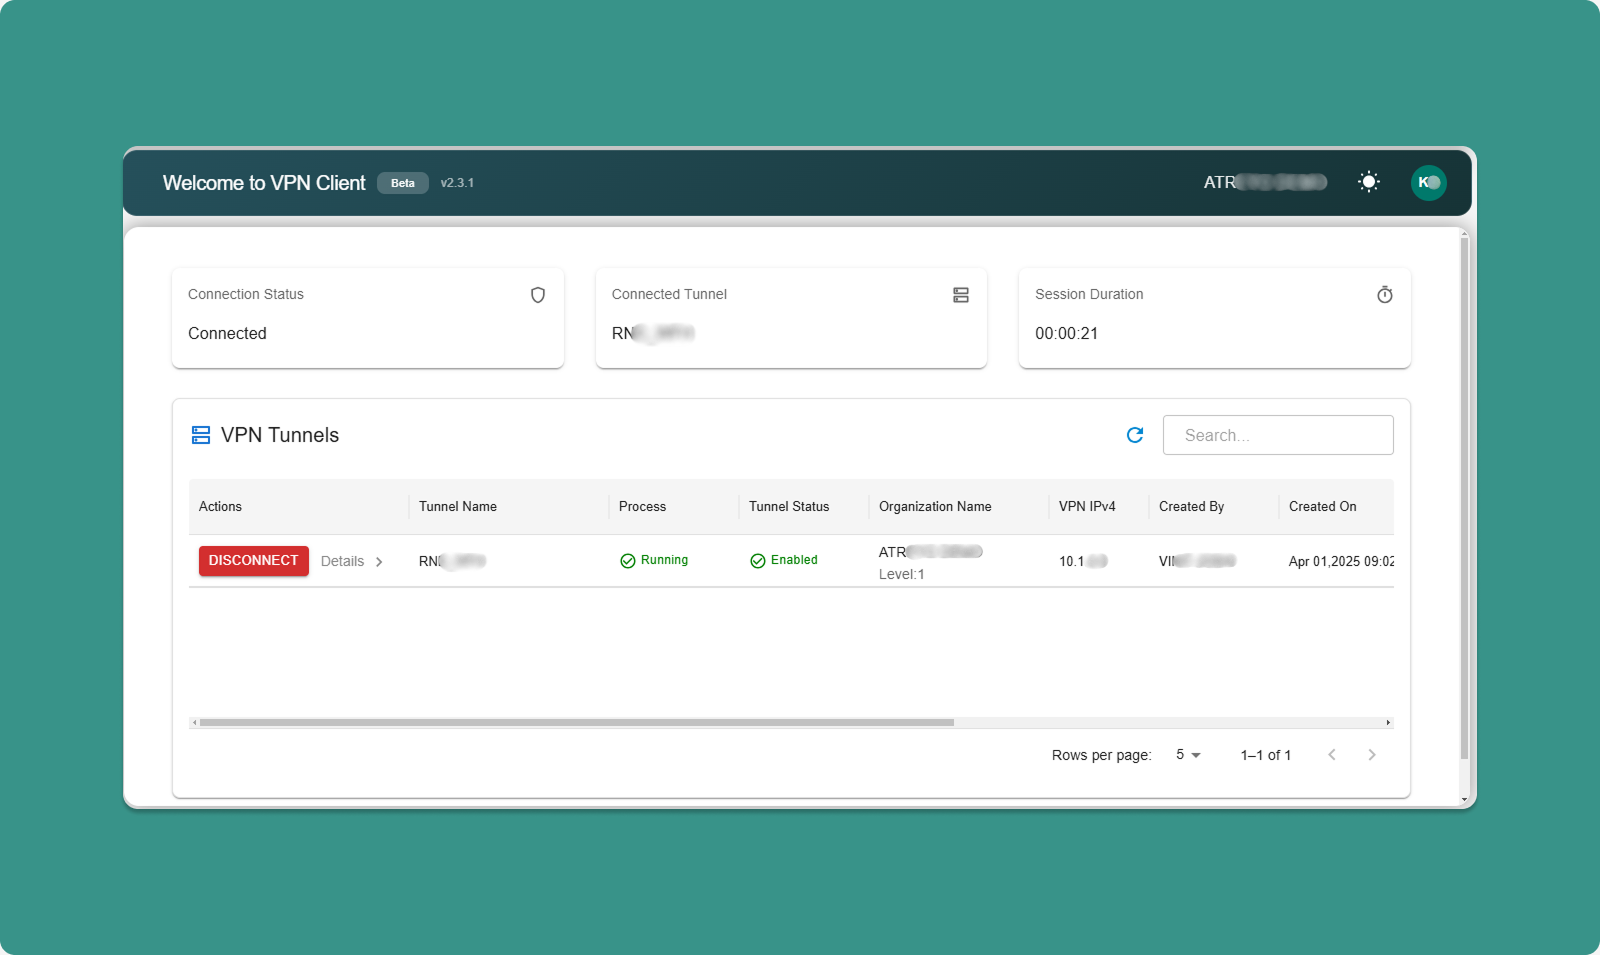
Step 3: Connected State
Once connected, three status cards appear at top of application:
Card 1: Connected Tunnel
-
Shows tunnel name you're connected to
-
Example: "Connected to: Factory_Production_VPN"
Card 2: Connection Details
-
Your VPN IP address
-
Example: "Your VPN IP: 10.8.0.25"
-
Gateway IP
-
Connection speed/status
Card 3: Session Duration
-
Time connected
-
Example: "Connected for: 00:45:23"
-
Updates in real-time
While Connected
What You Can Do:
-
✅ Access devices in tunnel via their VPN IPs
-
✅ Access devices' local networks (if Network Forwarding enabled)
-
✅ View connection details in status cards
-
✅ Monitor session duration
-
✅ Click "Details" to view device information
What You Cannot Do:
-
❌ Connect to other tunnels (must disconnect first)
-
❌ Close application (minimizes to system tray, stays connected)
Other Tunnels:
-
While connected, other "Connect" buttons are disabled (grayed out)
Disconnecting from Tunnel
Manual Disconnect
Step 1: Click Disconnect
-
Locate "Disconnect" button on active tunnel row
-
Click "Disconnect" button
-
VPN session cleanly closes
-
OpenVPN process terminates
Step 2: Disconnected State
After disconnection:
-
Status cards disappear from top
-
Button changes back to "Connect"
-
Other tunnels become available (buttons enabled)
-
Can connect to different tunnel
Effects:
-
Cannot access tunnel devices anymore
-
Local network access lost
-
VPN IP deallocated until next connection
Automatic Disconnect
Scenarios Where App Auto-Disconnects:
1. Internet Connection Lost:
-
VPN requires active internet
-
If internet drops, VPN disconnects automatically
-
Notification appears: "Connection lost"
-
Attempt to reconnect when internet restores
2. Tunnel Stopped by Administrator:
-
Administrator stops tunnel process
-
All connections terminate
-
Notification: "Tunnel stopped by administrator"
3. Tunnel Disabled by Administrator:
-
Administrator disables tunnel
-
Process stops, all connections drop
-
Notification: "Tunnel disabled"
4. User Removed from Tunnel:
-
Administrator removes you from tunnel
-
Connection immediately terminates
-
Notification: "Access revoked"
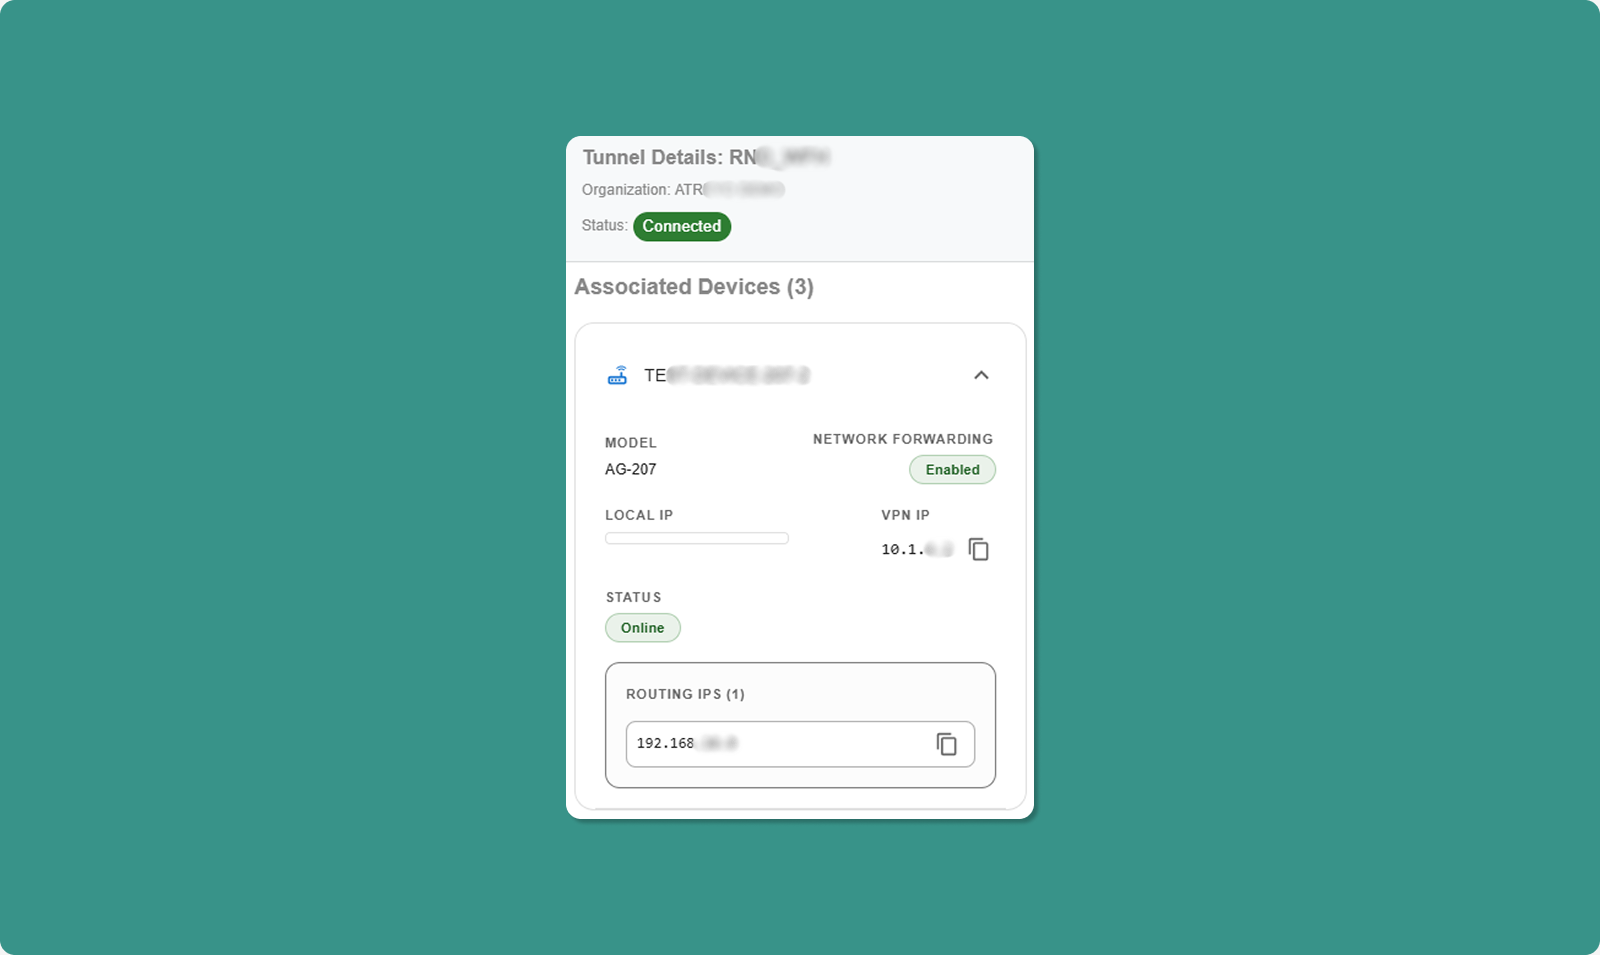
Device Details Sidebar
Click "Details" button to view devices in the tunnel.
Opening Details Sidebar
-
Locate tunnel in table
-
Click "Details" button (typically icon button)
-
Sidebar slides in from right side
Sidebar Contents
Header:
-
Tunnel name
-
Close button (X) to dismiss sidebar
Device List:
For each device, displays:
|
Field |
Description |
Example |
|
Device Model |
Hardware model name |
AG-702-LT-EU-V48 |
|
Local IP |
Device's LAN/WAN IP |
192.168.1.50 |
|
VPN IP |
Device's tunnel IP |
10.8.0.10 |
|
Network Forwarding |
Forwarding state |
Enabled or Disabled |
|
Connection Status |
Device online/offline |
Connected, Disconnected |
|
Routing IP |
Available network routes |
192.168.1.0 |
Understanding Routing IP
What is Routing IP?
-
Lists network ranges accessible through this device
-
Only shown when Network Forwarding = Enabled
-
CIDR notation (e.g., 192.168.1.0)
Example:
Device VPN IP: 10.8.0.10
Network Forwarding: Enabled
Routing IP: 192.168.1.0
What This Means:
-
You can access device at 10.8.0.10
-
You can also access any device on 192.168.1.x network (192.168.1.1 through 192.168.1.254)
-
Traffic routes through 10.8.0.10 to reach local network
Use Case:
Your Computer (VPN: 10.8.0.25)
↓
Connect to: 192.168.1.100 (PLC on device's LAN)
↓
Routes through: 10.8.0.10 (gateway device)
↓
Reaches: PLC at 192.168.1.100